KeePass 2, Password Management
11 minutes
Tip using Ko-fi or Buy Me a Coffee
With the recent admission from Adobe that it lost over 150 million user accounts from its online database in October. I thought it would be wise to go over my tool of choice for password management, KeePass.
In the case of the Adobe breach hackers managed to get the email addresses, passwords, credit/debit card details including expiry dates and more for every Adobe user account created on the system. One can not understate gravity of this breach. Losing banking details is bad enough but Adobe also used reversible encryption to store the user passwords. This means all 150 million passwords will eventually be unencrypted and passed around the Internet to multiple dubious organisations and persons.
That will be an immense problem as most people use the same login and password combination for multiple online accounts. That could potentially grant hackers, spammers and identity thieves access to hundreds of millions of online accounts with some simple trial and error.
As of writing (14th November 2013) a list of the top 100 passwords used within the system has been reversed by security researchers who obtained a copy of the leaked database. Nearly 2 million accounts used the password ‘123456’. Another 446,000 used ‘123456789’ and 346,000 used ‘password’.
Now we all know why people use simple passwords as they are easy to remember and simple to type. This has become more pressing as people use touch devices to reach online accounts that make the typing of complicated passwords difficult.
A major problem with this Adobe breach is that not only do the victims have to change the password of their Adobe account. They need to change all the passwords to other accounts that use the same login and password combination. Probably the first targets for this stolen login data will be the usual suspects, Banks, Ebay, Paypal, Facebook, Amazon, Google, Apple and Twitter.
This is why you should use a password management application such as KeePass. A password manager allows you to not only use strong, complicated passwords that you don’t need to manually type in at each request. It makes the use of unique passwords for online accounts simple. So if a security breach were to occur with another online service, a stolen unique password would be only useful for that compromised account.
KeePass – The Good, The Bad, The Ugly
In technology there is a constant conflicting battle of convenience verses security. The use of KeePass follows the path of security at the expensive of convenience and that can make its use complicated and confusing for new users.
The trick to using KeePass is to ignore the many choices it throws at you and focus on what you intend to use. I hope that this article will negate the potential steep learning curve that can come with early usage of KeePass.
KeePass – Install
KeePass can be downloaded from http://keepass.info/download.html
Unfortunately the download page is as complicated as the program itself. As a Windows user you want the Professional Edition. Don’t worry, despite the name it is free and open-sourced. I would recommend the Portable KeePass (ZIP Package) download over KeePass (Installer EXE for Windows). As the portable edition makes it easier to make copies and backups your KeePass configurations.
When downloaded, right-click the KeePass-2.*.zip file and Extract All. Follow the wizard to unpack the file to where you want KeyPass stored. I usually unpack it and keep it in C:\Portable\KeePass\.
In the extracted directory you should see KeePass.exe which will launch the KeePass application. If you want to create a shortcut to your desktop, right-click the program and select Send to > Desktop (create shortcut). Otherwise launch the application. I’d recommend for Windows 7+ users to right-click the program in the Taskbar and select Pin this program to the taskbar.
Create a password database
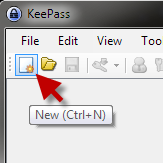
When you run KeePass for the first time the application without a database is loaded. Create a new database by selecting the New button (or press Ctrl+N on your keyboard).

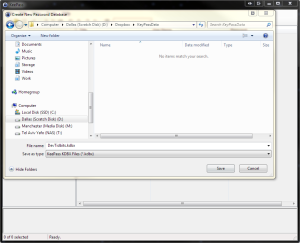
In the Create New Password Database dialogue navigate to where you want to store your KeePass database. You can store it in a directory that automatically synchronises online with a cloud service such as DropBox, Microsoft SkyDrive or Google’s Drive. This will backup your database which is very important and allow you to share it with KeePass compatible mobile applications.
I will create a database called DevTidbits.kdbx and store it in D:\Dropbox\KeyPassData\.
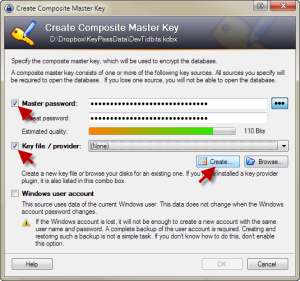
You will now be prompted for a Master password at the Create Composite Master Key dialogue. KeePass will prompt for this database access password at startup. So make sure it is not too difficult to type and something you will remember.
Create a secure key file for the database
For added security I recommend selecting the Key file / provider check-box and press the Create … button. This will further encrypt the database whereby it will need both the Master password and the key file before being accessible. If the key file is deleted or lost the database will not be usable.
For simplicity and the purposes of this tutorial I will name the key file DevTidbits.key and store it in my Downloads directory at C:\Users\Ben\Downloads\misc\. For added security you should give it a more obscure name and store it elsewhere on your hard drive or even on a USB stick. But make sure you keep multiple copies for backup!


The idea of a separate key file is that it be kept separate from your encrypted database and if you’re paranoid off the Internet altogether. That way if the database is ever lost or copied by people who shouldn’t have access. You can create and apply a new key to your KeePass database. Then permanently delete the old key file used by the comprised database to make it inaccessible.
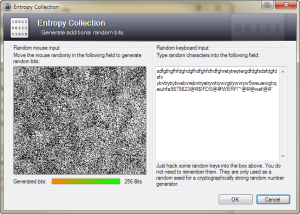
At the Entropy Collection dialogue you are asked for some Random mouse input and Random keyboard input. Sporadically move your mouse cursor over the black and white texture in the mouse input until the Generated bits bar is green and reaches 256 Bits. Then in the text area of the Random keyboard input type in a large number of random characters. The purpose of this randomised data is to generate a unique key tied to your KeePass database that will never be replicated again.
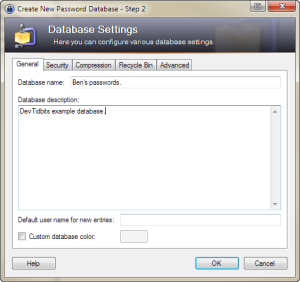
Finally at the Create New Password Database – Step 2 dialogue in the General tab. Give your database a name at the Database name: input and a description at the Database description: text area.
Further information: KeePass – Composite Master Key documentation.
Configure columns to display passwords
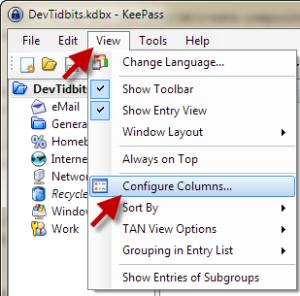
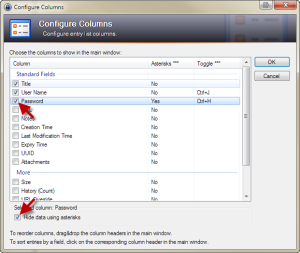
Once done KeePass should load your new database and propagated with some sample groups and entries. As I have customised KeyPass earlier your results may look a little different to mine. For example my passwords are showing while by default KeyPass hides these. To customise your own display select View from the top menu and Configure Columns… To show passwords select Password and deselect Hide data using asterisks. This is not recommended if you are intending to use KeePass in a public environment such as an open plan office or cafe.
KeePass Basic Usage
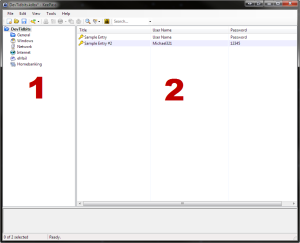
Back at the KeyPass main screen I have highlighted the two main panes. The left pane which I marked with a 1 has the KeyPass groups. This pane operates like a computer directory system where you can store multiple password entries. The entry pane marked as 2 displays a list of the entries in the active group.
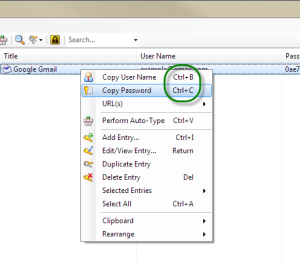
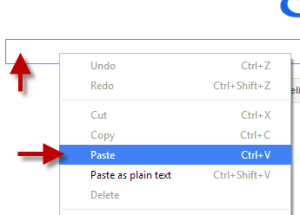
When you select a password entry you can right-click it to bring up a menu. The two most useful options in this menu are the Copy User Name Ctrl+C and Copy User Password Ctrl+B. Take note of those two keyboard combinations as they will be in use often. Both options will copy the relevant data from the selected entry to your clipboard stored in the computer’s memory. In a web page login, password input or a text editor like Notepad you can Paste text or use the Ctrl+V keyboard combination to insert the clipboard data.
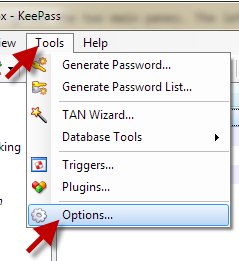
For security the data will be automatically deleted from the computer’s memory after 2 minutes. You can change this countdown at any time by using the Tools > Options… top menu and adjusting the Clipboard auto-clear time (seconds) value.

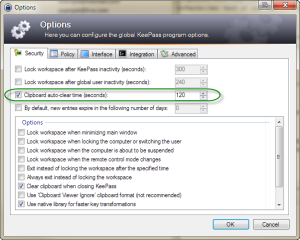
Further information: KeePass – Using Stored Passwords documentation.
Add a new entry
In the groups pane (the one on the left) select a group such as eMail.
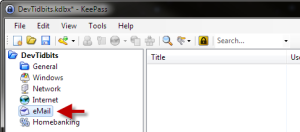
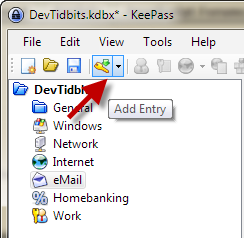
Now either use Ctrl+I (i for insert) or press the Add Entry button to bring up the Add Entry dialogue.
From here all fields are optional but I generally give each entry a Title, User name, Password and a URL for the site.

In the Password field you can either copy or type in your existing password or generate a new one using the Generate a password button.
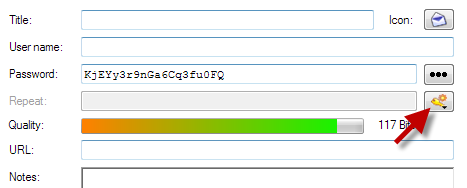
The button will bring up a menu that will list some predetermined randomisers to create alpha-numeric passwords at a predetermined length. This is to help alleviate the issue where some websites have length restrictions on user account passwords.
The 40-Bit Hex Key will generate a short 10 character alpha-numeric password.
The 128-Bit Hex Key generates a standard 32 character alpha-numeric password.
The 256-Bit Hex Key generates a stronger 64 character alpha-numeric password though some websites may reject this length.
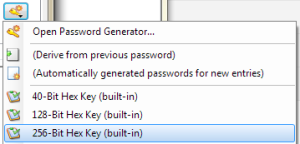
Remember if you decide to generate a new password for an existing web account. You will also need to login to the site and change its existing login password.
When you enter a password the Quality bar indicator lets you know the strength of the password based on the variety of characters and length.
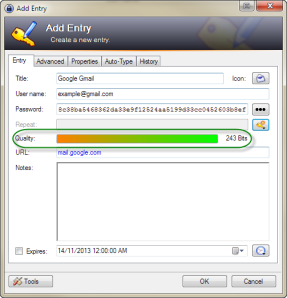
Further information: KeePass – Password Generator documentation.
Complex password complications
A word of warning, you probably do not what to use a long complicated password for a service like Apple ID or Google Accounts as unfortunately they’re impractical. Both companies use unified passwords for all their products and services. Which means you could find yourself needing to enter these passwords with smart devices such as phones, tablets and digital media players that do not have keyboards or access to your KeePass database.
Add a group
To create a new group first select in the group pane where the group should go, either the database name or within an existing group.
Right-click to bring up the group menu and select Add group.
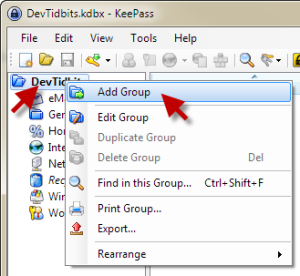
Give the group a distinct name, choose an icon if you wish and press OK. You now have an additional group to add or move entries into.
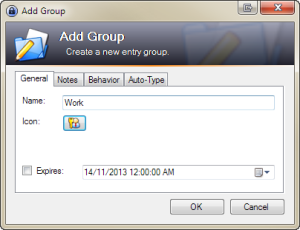
To move an entry into a group just select it then drag and drop. You can move groups around the same way.
Remember you can use KeePass for other data that needs security other than just website and network passwords. Some suggestions could be software registration keys and serial numbers. Wallet content such credit/debit card, social security, frequent flyer and other membership details. Private phone numbers. Private or public keys used for email, file and system encryption.
Save changes
By default KeePass does not automatically save any changes to your database.
You can tell the database has changes that need saving by the asterisk * next to the database file name. As shown in the title bar and highlighted in my screenshot by the orange arrow.
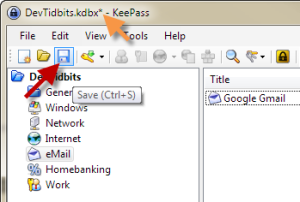
To save your changes press the Save button or use the Ctrl+S keyboard combination.
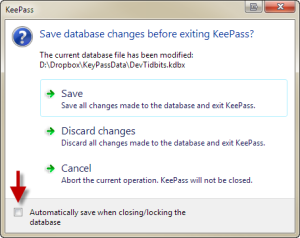
If you quit KeePass before saving the changes you will be prompted with Save database changes before exiting KeePass dialogue. There is a check-box there to Automatically save when closing/locking the database for future exits.
Use search to find entries
Once you find that the collection in the database is quite large you can use Quick Find to hunt for each entry. For this reason I always give the Titles to my entries descriptive names using both the company title and the product brand.

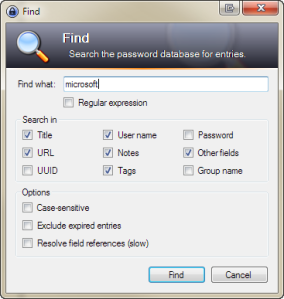
Otherwise it maybe difficult to quickly filter some searches. If I use [email protected] as my default login for most websites and then search for ‘hotmail‘ for my Microsoft log-in data. All the entries with the [email protected] User name will be in by the results. So I’d instead give my Hotmail entry the title of Microsoft Hotmail and use the search term ‘microsoft‘.
KeePass also offers a more fine-tuned Find dialogue that pops up with the Find button or the Ctrl+F keyboard combination.
You’re done
Congratulations that covers the basics of KeePass on Windows. There are many software ports for other platforms including mobile devices and JavaScript, some of which I hope to cover at a later date.
Written by Ben Garrett
