Make the Windows Command Prompt, Linux-like
24 minutes
Oct 2022: mentions of new Microsoft tools, embedded code samples, tweaks to the text, fixed links
Feb 2016: reflects Windows 10, added how-to chocolatey, 64/32-bit question, updated screenshots
Mar 2015: added information on rsync, OpenSSH clients and updated some links plus io.js
May 2014: first publication
Tip using Ko-fi or Buy Me a Coffee
In this entry I will explain my method of improving the Windows Command Prompt and its command-line. To turn it from a crude shell prompt into an ANSI coloured interface with a useful set of tools that can commonly be found on Linux and Mac terminals. We will also integrate a number of optional popular programming languages, a software package manager and other features. This will require some existing knowledge of Windows and its command-line.
But before we get into that let’s go on a trip down memory lane for some Historical Context or jump straight to Windows Command Prompt.
Historical context
In the ancient days of personal computing during the mid to late 1970s and the early days of Microsoft. There was a popular text only operating system called CP/M. By today’s standards it was rather crude and rudimental but at the time it was popular in business due to its relative ease of use.
Years later when Microsoft delivered to IBM its first PC operating system. It became apparent that the Microsoft operating system MS-DOS was a derivative of this earlier CP/M system.
I bring this up because to this day the default and most common Windows command-line the Command Prompt cmd.exe. Can trace its lineage back to this 1970s operating system from the defunct Digital Research.
After Windows became popular Microsoft merged both its MS-DOS shell and Windows overlay together into a operating system known as Windows 95. So for the longest time until the release of Windows 2000 and XP. Most consumers used a version of Windows that had a MS-DOS Command Prompt as a critical component of the operating system.
With Windows 2000, XP and later operating systems the MS-DOS functionality was pushed to the wayside and has been neglected ever since. Since the release of PowerShell in 2006 this neglect deepened. In fact the original iteration of the Command Prompt in Windows 10 is not too different to the one which was found in Windows 95 over 29 years ago.
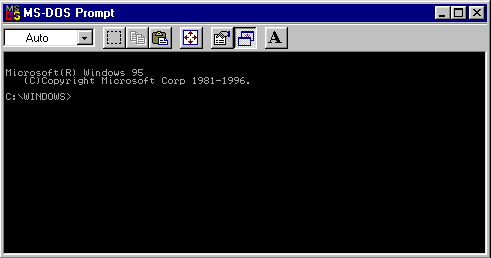
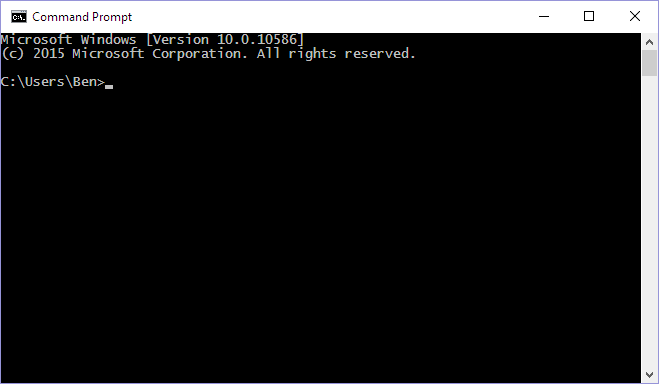
Windows Command Prompt
So let us start with the default Command Prompt.
In Windows 10/11 type CMD into the Search the web and Windows (otherwise called Cortana) search box. With earlier versions of Windows use the Run feature (usually this can be done with the Windows key and r
⊞+R) and type in CMD. This should launch the default Command Prompt application similar to the prompt above.
The Command Prompt CMD.EXE is the application that we use to input and receive feedback from the command-line shell. The shell is a collection of programs that allows you to interact with the Windows filesystem and operating system.
This is an important distinction because we are going to replace the Command Prompt but not the underlying command-line shell.
64-bit or 32-bit?
Throughout this guide there will be a number of downloads that will ask you to pick which edition you wish to fetch. Usually you’ll have the options of 32-bit or 64-bit, but sometimes these will be referred to as x86, x64 or AMD64.
32-bit software (x86) can run on any edition of Windows.
64-bit software (x64, AMD64) can only run on 64-bit editions of Windows. Nearly all modern computers running Windows 8, 10+ or older computers with 4 or more GB of RAM will use a 64-bit operating system. The 64-bit software running on 64-bit operating systems can access more system resources so possibly offer improved performance and should be your preference.
If you’re unsure which operating system architecture you have, type the following into the command prompt.
$ echo %PROCESSOR_ARCHITECTURE%
Replace the Command Prompt, CMD.EXE with ConsoleZ
UPDATE: Instead of using ConsoleZ, users of Windows 10, 11+ are better off with Microsoft's new terminal emulator, Windows Terminal. As of October 2022, Windows Terminal is the default console application for new Windows 11+ installations.
First create a directory on the root of your hard drive to contain all your command-line tools. I will use c:\terminal but any name is fine. I do recommend that you keep the directory name short and use a complete word without any spaces.

I am going to use an open sourced Command Prompt replacement application called ConsoleZ by Christophe Bucher. Which itself is a fork of a more popular replacement application known as Console2 by Marko Bozikovic.
Download the newest edition of ConsoleZ, save the download to your c:\terminal directory and unzip it.

ConsoleZ is a portable application which means it does not need to be installed to work. This means you can easily archive and backup the whole c:\terminal directory into a zip file or copy it to a USB stick or a secondary computer without losing any of your customisations or settings.
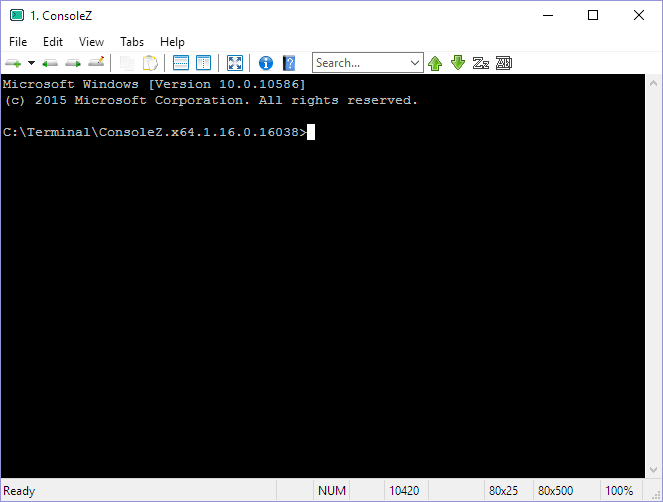
ConsoleZ customisation
With ConsoleZ you have an alternative Command Prompt. I do the following customisations to give it a less cluttered look but you can pick and choose which ever you want.
- menu > View > Toolbar off
- menu > View > Status Bar off
- menu > View > Tabs on
- menu > Edit > Settings > Console
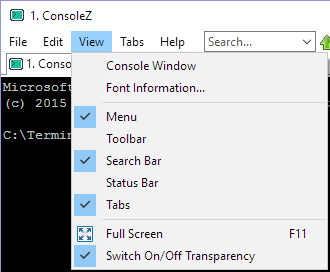
Change the Windows size Rows value if you want a longer command-line interface by default.
Change the Buffer size Row value if you want to keep a larger backlog of command-line output. By default 500 lines of text are stored to memory but increasing this value is useful if you want to display and scroll through large logs or text files. I usually increase it to its maximum value of 32766.

ConsoleZ font
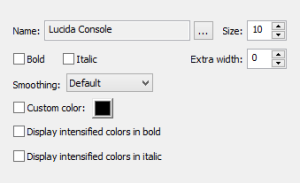
Next up is I adjust the font selection which can be an important personal choice depending on your requirements and screen size. The default font is Courier New at a size of 10.
- menu > Edit > Settings > Appearance > Font
I change Name to use Lucida Console in regular with a Size of 10. But play around until you find a font and size combination that you like.
Command and batch scripts
In c:\terminal create a new subdirectory named cmd-scripts, ie c:\terminal\cmd-scripts.
This will contain my custom text based scripts that use the file extension .bat or .cmd. Modern Windows scripts use the .cmd command extension while the .bat batch is a MS-DOS legacy convention that functions the same.
Colourise the console with ANSI color
Users of Windows Terminal can skip this chapter as it has inbuilt ANSI color support.
In the 1980s and 1990s Windows and MS-DOS supported a widely used feature called ANSI escape sequences that allowed additional functionality such as colour text. But this support was dropped in more recent Windows editions. So I will show you how to re-implement ANSI escape sequence support using Jason Hood’s excellent ANSICon shell overlay.
Visit the ANSICon website at https://github.com/adoxa/ansicon/releases.
Download the file ansi166.zip and save it to c:\terminal.
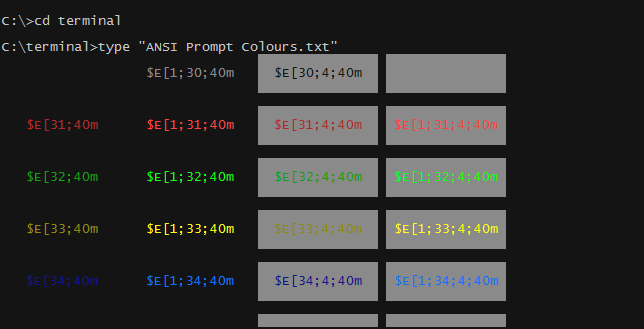
Now if you run the command type "ANSI Prompt Colours.txt" you should see a whole lot of garbled text dumped to the ConsoleZ window. These are ANSI escape sequences combined with plain text that Windows does not know how to interpret.

Download then save ANSICon to your c:\terminal directory and unzip it into its own ansicon directory. I keep it in c:\terminal\ansicon.
Use notepad or notepad++ to create a new file called shell-colour.cmd. Copy and save the following code to the shell-colour.cmd file.
::File: C:\terminal\cmd-scripts\shell-colour.cmd
@echo off
C:\terminal\ansicon\x64\ansicon.exe
If you are using 32-bit Windows or 32-bit ConsoleZ you should replace the following code
c:\terminal\ansicon\x64\ansicon.exe
with
c:\terminal\ansicon\x86\ansicon.exe.
Back in ConsoleZ we will set the shell-colour.cmd as our default shell. This is a hack that loads ANSICon in addition to the default cmd.exe shell to give us ANSI escape sequence support without replacing the underlying shell.
- Menu > Edit > Settings > Console
Under Shell: add c:\terminal\cmd-scripts\shell-colour.cmd

Now load a new tab.
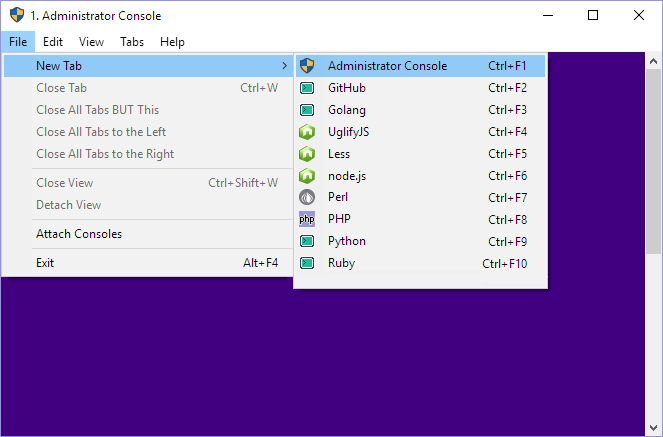
- menu > File > New Tab > Console 2
Or relaunch ConsoleZ. In c:\terminal display the ANSI Prompt Colours.txt using the following commands.
$ cd terminal
$ type "ANSI Prompt Colours.txt"
If you see coloured text, congratulations you now have ANSI escape sequence support.
Colourise and customise the prompt
The default Windows text input prompt only lists the active drive and current directory. As a frequent Linux shell user I like a bit more flare and information to my prompt.
Use notepad or notepad++ to open your existing shell-colour.cmd file in c:\terminal\cmd-scripts. Copy and save the following code to the shell-colour.cmd file.
::File: C:\terminal\cmd-scripts\shell-colour.cmd
@echo off
echo Welcome to %computername%
echo %username%'s user directory %userprofile%
echo.
prompt $E[0;32;40m%username%$E[1;30;40m@$E[0;32;40m%userdomain%$E[1;30;40m:$E[1;34;40m$P$E[1;30;40m$$$S$E[0m
::ansicon is not needed for uses of Windows Terminal
C:\terminal\ansicon\x64\ansicon.exe
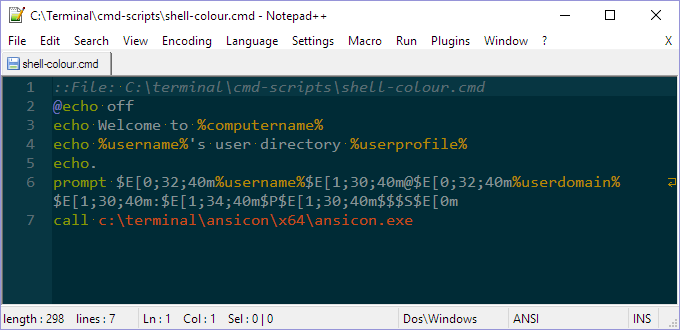
This code adds a couple of new commands. The echo command displays text to your command-line while the prompt command customises the input text prompt. The strings that are wrap within percentage symbols % are environment variables that are accessible from the shell. They allow you to display tidbits of information that are stored by Windows to the computer memory. A complete list of environment variables can be found at How-to: Windows Environment Variables.
The prompt command has some rather cryptic ANSI escape sequences that introduce colours. The $E string is a prompt argument to display escape characters which conveniently is needed by the ANSI escape sequences as a trigger. The [number;number;40m is a code sequence used to trigger an effect. A list of ANSI escape effects and colours is found on Pueblo.
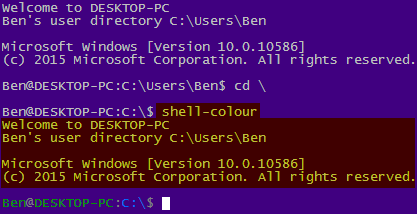
Reload ConsoleZ or open up a new tab to apply the changes. You should see a more information pack and colourful input text prompt.
The first part of the prompt in green displays the USER @ DOMAIN while the second part in blue displays the active drive and path.

ConsoleZ, set a Default Directory at launch
By default ConsoleZ sets the active directory to the location of its application which in my case is c:\terminal\ConsoleZ.x64. But you can easy change this by doing the following.
- menu > Edit > Settings > Console
Set Startup dir: to the path of your choosing such as c: or you can use a Windows environmental variable such as %userprofile%.

ConsoleZ, create a Run as Administrator tab
A neat feature of ConsoleZ is the ability to create shell tabs with different user account permissions including those of an Administrator. As there are times when less restricted access is required to interact with parts of the Windows and its settings.
In ConsoleZ do.
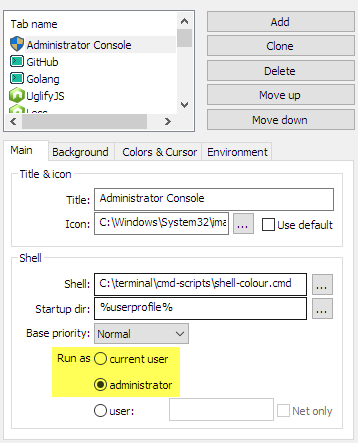
- menu > Edit > Settings > Tabs > Add
In the Main tab change the Title: value to something more meaningful such as Administrator Console.
Point the Icon: to C:\Windows\System32\imageres.dll and select the yellow and blue shield icon which represents Run as administrator.
Under Shell make sure the Run as option is selected and the administrator radio is selected.
Press OK when done. You now have a new Run as administrator tab accessible from ConsoleZ.
Configuring paths
To run most tools and software from the command-line the active directory has to be the same as the location of the tool.
For example if I am in C: and try to run our script shell-colour.cmd that is located in c:\terminal\cmd-scripts. The shell returns the error ’shell-colour.cmd’ is not recognized as an internal or external command, operable program or batch file. Which basically means the shell could not find the command I was trying to run.

But by using the Windows environment variable called %PATH% we can add additional directories that the shell will scan in when it searches for the existence of programs.
Windows 10 1511 (November 2015) has a useful environmental variable editor that can be accessed by typing environment into the search the web and Windows search box. Select the Edit the system environment variables for your account option. Click the Environment Variables… button. Now you have access to both the user variables and the system variables editor. Feel free to skip to Changing PATHs.
Configuring the %PATH% variable in earlier editions of Windows is a bit messy using the default Windows Control Panel option. So I prefer to use a third-party portable tool called Rapid Environment Editor by Oleg Danilov.
Download, unzip and run the editor.
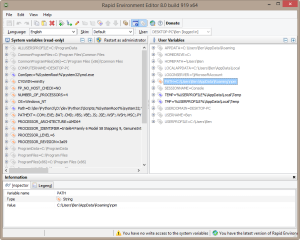
The pane on the left contains a list of editable Windows system variables. While the pane to the right has variables that are restricted to your current Windows user account. You may notice there is a PATH= variable for both the system and the user panes.
I generally use the system PATH for my c:\terminal path links. But to modify this you need to run Rapid Editor in administrator mode.

Changing PATH
By default Windows stores multiple values of the PATH in a single string separated by semicolons ;. Fortunately Rapid Editor and Windows 10+ allow you to list and edit each individual PATH entry.
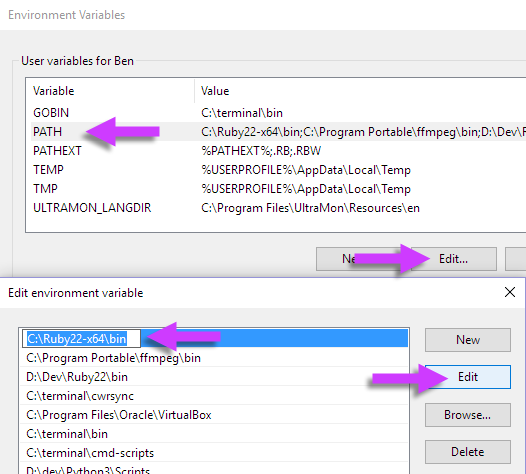
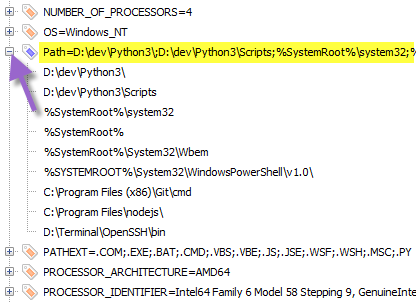
To add new directories to the PATH;
In Windows 10+ click the PATH variable and click Edit. In the Edit Environment Variable dialog click New then click Browse. In the Browse For Folder dialog point it to your c:\terminal\cmd-script directory under This PC. You should now have a new entry in your PATH list. Press OK to save the changes and close the dialogs. Read on at Test your PATHs.
For users of Rapid Editor, right-click the PATH= string select Add value or use the
Alt+INS keyboard combination.
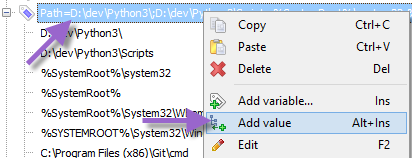
Press
F7 or select Insert directory path… Then point it to your c:\terminal\cmd-script directory. You should now have a new entry in your PATH list. Save the changes by pressing the Save icon or using
Ctrl+S.

Test the PATH
Now for changes to have an effect you have to either restart ConsoleZ or open up a new tab. To test that the PATH modifications are active, issue a cd command to return to the directory root and try running the shell-colour command again. If it works then congratulations you can now run any custom scripts placed into c:\terminal\cmd-script from anywhere in your command-line.
Launch Windows Notepad++ or Notepad from the command-line
While I love using command-line shells I generally prefer a GUI when it comes to programming or editing text files. I use the following script to to edit a file from the command-line. It launches Notepad++ and opens the file supplied but you can use any text editor including Windows Notepad located in C:\Windows\System32\notepad.exe.
Download and save edit.cmd to your c:\terminal\cmd-scripts directory.
::File: c:\terminal\cmd-scripts\edit.cmd
@echo off
@setlocal enableextensions enabledelayedexpansion
set text_editor="C:\Program Files (x86)\Notepad++\notepad++.exe"
%text_editor% %*
endlocal
In a new session of ConsoleZ test the edit script with the following commands.
$ cd terminal
$ edit "ANSI Prompt Colours"
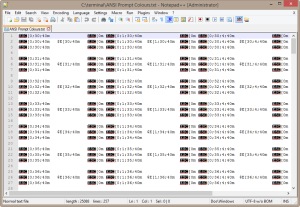
To regain your prompt either close Notepad++ or press Ctrl+C in ConsoleZ.
Congratulations the core of this guide is complete. The following paragraphs below are optional so you can pick and mix which topics you wish to implement.
Setup a software package manager
Package managers automate the process of downloading, installing and removing software from an operating system. While common in the Linux world with tools such as apt-get and yum, package managers are less used in the Windows world. Valve’s Steam platform is the odd exception which has become the primary means for many PC gamers to install and administer their games.
For utilities and applications the best command prompt package management tool is Chocolatey. It allows you to install and administer both text and GUI Windows software from the command prompt.
UPDATE: In May 2021, Microsoft released its software package manager, Windows Package Manager CLI (aka winget).
I am also a regular user of Scoop - A command-line installer for Windows.
But before deciding if Chocolatey is for you there are a number of caveats common with all package management tools that should be highlighted.
The software installed by the Chocolatey is maintained by volunteers. They obtain the software from its authors and repackage it into a setup that is compatible with the Chocolatey framework.
This means there is a middleman handing the software that gets installed onto your system and creates an added security risk. Business environments probably would not find this situation acceptable.
The other main negative with package management systems is that it is not uncommon for the service to offer out of date software. At the time of writing Chocolatey has nearly 4,000 unique packages that all need to be maintained its volunteers. If you find out of date packages on the service then the only way to fix these is to contact the maintainers and hope they are still interested or become a maintainer yourself.
To install Chocolatey run the following in an Administrator command prompt.
@powershell -NoProfile -ExecutionPolicy Bypass -Command "iex ((new-object net.webclient).DownloadString('https://chocolatey.org/install.ps1'))" && SET PATH=%PATH%;%ALLUSERSPROFILE%\chocolatey\bin
Once finished test that the Chocolatey install completed successfully by running its help command.
$ choco -h
The term packages is what Chocolatey uses to refer to the software it manages. If you’re unfamiliar with package managers you may wish to read Chocolatey’s Getting Started guide.
Here are a few useful Chocolatey commands.
Search for a package
$ choco list [search term or filter]
Or browse the packages list on the website.
Install a package
$ choco install [package name] -y
View the version of an installed package
$ choco list [package name] -l
Upgrade an existing package
$ choco upgrade [package name] -y
Remove an existing package
$ choco uninstall [package name]
List all installed packages
$ choco list -l
Update all installed packages
$ choco upgrade all -y
Using the -noop option you can test the output of any choco command without it applying any changes.
$ choco install flashplayerplugin -y -noop
$ choco upgrade all -y -noop
Useful Windows command-line tools
Besides the complete collection of commands and command-line programs built into Windows that you can discover at Command-line reference A-Z and An A-Z Index of Windows CMD commands. There are quite a number of useful third-party programs that are available for the Windows platform. I like to keep these contained in a single directory at c:\terminal\bin. bin is an abbreviation for binary, an alternative term for a program file or app.
Create the directory c:\terminal\bin and then using the processes covered in Configuring Paths add c:\terminal\bin to your PATH variable. Restart ConsoleZ and so that any programs placed into c:\terminal\bin should be accessible from anywhere within your shell.
A few Windows command-line tools I recommend
There are a number of useful tools created by NirSoft.
- I personally use nircmd for use with various command scripts as well as WirelessNetConsole, bluetoothcl, whosip and whoiscl.
- Chocolatey package:
choco install nirlauncher
Microsoft’s Systeminternals also has a few command-line utilities.
- AccessChk, Coreinfo, Handle, ProcDump and PsTools Suite.
- Chocolatey package:
choco install sysinternals
Handling compressed files and archives
- 7-Zip 9.20, command line version
- Chocolatey package:
choco install 7zip.commandline
- UnRAR for Windows
- Chocolatey package:
choco install unrar
Multimedia conversion
- ImageMagick can be used to convert and create image files.
- Chocolatey package:
choco install imagemagick
- ffmpeg to convert audio and videos.
- Chocolatey package:
choco install ffmpeg
Programming tools
- Git for source-code management.
- Chocolatey package:
choco install git
Database tools
- MySQL utilities
- Chocolatey package:
choco install mysql.utilities
- SQLite portable database tools.
- Chocolatey package:
choco install sqlite.shell
Some other potential sources for standalone utilities include.
Linux and Unix terminal tools for Windows
UPDATE: Windows 10 and 11+ can run Linux distributions and programs from within Windows using Windows Subsystem for Linux (WSL) by Microsoft.
Using WSL is more secure and is the best way to use Linux programs within Windows, so this chapter should be skipped.
As a frequent Linux shell user there are a number of tools I miss on Windows. Fortunately as much of Linux is open sourced many of those tools have been ported over. Unfortunately some of these ports are horribly out of date so they should be best avoided.
There are also a couple of popular Windows open source C compilers such as Cygwin and MinGW that contain ports of Linux terminal tools. But in my opinion their use are overkill and many of the ported tools are rather old.
My favourite collection of ported Linux tools for Windows is the still current GOW (GNU On Windows) by Brent Matzelle. It includes a large collection of GNU terminal tools and programs including cURL, gawk, grep, ls, nano, tar, vim and many more.
Chocolatey package: choco install gow
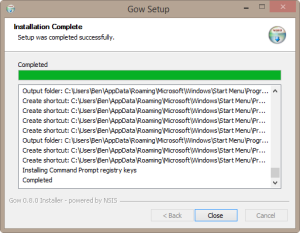
Download the latest release of Gow and install it to a directory of your choosing. I prefer placing it into c:\terminal\gow instead of its default directory C:\Program Files (x86)\Gow.
Gow will automatically copy all its application and configure PATH settings so you can use it straight away after a ConsoleZ reload or a new tab.
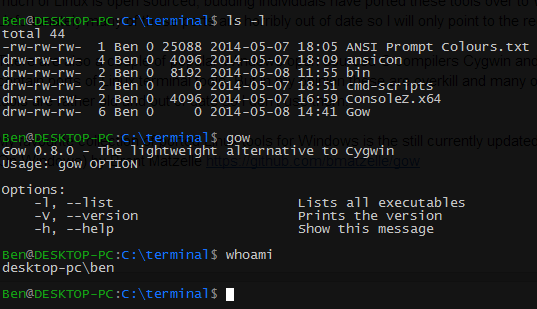
One command Gow does not replicate is the Bash alias ll (double L).
I have created a command script that replicates that functionality using Gow’s ls command. Save ll.cmd to your c:\terminal\cmd-scripts directory to use it.
::File: c:\terminal\cmd-scripts\ll.cmd
@echo off
ls --color -A -G -h -l %*

OpenSSH
UPDATE: In late 2018 Microsoft included OpenSSH with Windows.
Finally any useful terminal needs a copy of OpenSSH for remote logins. While there are many out of date variants of OpenSSH on Windows. I personally use OpenSSH for Windows ported by mls-software.com which is the most up to date port I have found.
Chocolatey package: choco install mls-software-openssh
Simply download the current ‘New’ version from their website, the download link is named setupssh-7.[version].exe and run the setup installer. The installer should automatically configure the %PATH% for you.
To test OpenSSH just output its version. If it doesn’t match the version number listed on mls-software.com site (7.1 p2 as of writing) then you probably have one or more copies of OpenSSH on your system that are taking president in your %PATH%. Tools such as Cygwin or Git can have their own out of date ports of OpenSSH.
$ ssh -V

OpenSSH_7.1p1, OpenSSL 1.0.2d 9 Jul 2015
rsync synchronisation
The popular Linux synchronisation tool rsync also has a Windows port.
ITeF!x offers a commercial package of the daemon/server with a GUI client and a free edition of the command prompt client.
Chocolatey package: choco install cwrsync
The free edition comes without an installer. So I just unzip it to C:\terminal\cwrsync and use Rapid Environment Editor to add a path to point to it.
To test that rsync is working.
$ rsync --version

rsync version 3.1.2 protocol version 31
Run PHP scripts from the Windows command-line
Chocolatey package: choco install php
Download a copy of PHP For Windows from http://windows.php.net/download/.
Unzip the PHP package to a directory of your choosing. I will use c:\terminal\php.
Without any arguments PHP does not do much in the terminal. So I created a command script to display the language version as the default behaviour. Download and place the php.cmd script into your c:\terminal\cmd-script directory and make any changes if needed.
::File: c:\terminal\cmd-scripts\php.cmd
@echo off
@setlocal enableextensions enabledelayedexpansion
set php=c:\terminal\php\php.exe
IF [%1]==[] (
	%php% --version
) ELSE (
	%php% %*
)
endlocal
To test your PHP configuration and the script run the command php.
$ php

PHP 7.0.3 (cli) (built: Feb 2 2016 14:38:29) ( ZTS )
Download the hi-php.php command line script and run it. It will print Hello, World! to the screen and quit.
#!/bin/env php
<?php
echo "Hello, world!";
?>
$ php hi-php.php
Hello, world!
Now to associate script files with the .php extension to run under our php.cmd script you do the following commands in a Run as Administrator session of ConsoleZ.
assoc .php=PHP.File
ftype PHP.File=c:\terminal\cmd-scripts\php.cmd "%1" %*
Test your configuration and run php-hi.php.
You can refine this one step further so you don’t even have to type the .php file extension. Open the Rapid Editor and under System variables add the value .PHP to the PATHEXT variable. In a new ConsoleZ tab you should be able to run hi-php without the file extension.
Run Perl scripts from the Windows command-line
For Perl I use Strawberry Perl for Windows portable edition which can be downloaded from its website.
Chocolatey package: choco install strawberryperl
Unzip it to a directory of your choosing. I place it in c:\terminal\perl.
Download and place the perl.cmd script into your c:\terminal\cmd-script directory and make any changes if needed.
::File: c:\terminal\cmd-scripts\perl.cmd
@echo off
@setlocal enableextensions enabledelayedexpansion
set perl=c:\terminal\perl\portableshell.bat
IF [%1]==[] (
	%perl% -v
) ELSE (
	%perl% %*
)
endlocal
To associate script files with the .pl extension to run under our perl.cmd script you do the following commands in a Run as Administrator session of ConsoleZ.
assoc .pl=Perl.File
ftype Perl.File=c:\terminal\cmd-scripts\perl.cmd "%1" %*
Download the hi-perl.pl command line script and run it. It will print Hello, World! to the screen and quit.
#!/bin/env perl
print "Hello, World!\n";
You can refine this one step further so you don’t even have to type the .pl file extension. Open the Rapid Environment Editor and under System variables add the value .PL to the PATHEXT variable. In a new ConsoleZ tab you should be able to run hi-perl without including the file extension.
Run Python scripts and programs from the Windows command-line
The default Windows download of Python 3.X automatically configures itself to enable you to run Python scripts and programs from the Windows command-line.
Chocolatey package: choco install python3
Download and install a Python edition of your choice from https://www.python.org/downloads/.
To test that Python has installed itself correctly you can download and run hi-python.py.
#!/usr/bin/env python
print("Hello, World!")
Run Ruby scripts and programs from the Windows command-line
Chocolatey package: choco install ruby
At the time of writing Ruby is a little bit behind on the Windows platform. So with this in mind I recommend using the RubyInstaller for Windows which is a self-contained Ruby install.
Run the setup program and when prompted make sure you select both checkboxes for the options below.
- Add Ruby executables to your PATH
- Associate .rb and .rbw files with this Ruby installation
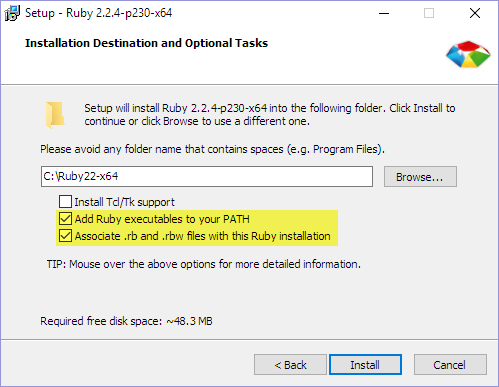
To test your Ruby installation download and run hi-ruby.rb.
#!/usr/bin/env ruby
puts "Hello, World!"
Run Node.js and Javascript from the Windows command-line
Chocolatey package: choco install nodejs
Download and install the latest node.js release from https://nodejs.org/. It will create the required PATH variables for you. Unfortunately many Windows editions associate files with the Node and JavaScript .js file extension to the legacy Windows Script Host application. It is probably best that you do not overwrite the Windows Script Host configurations and instead run all Node and JavaScript scripts using the node command.
$ node somescriptfile.js
To test your Node installation download and run hi-node.js.
#!/usr/bin/env node
console.log("Hello, World!");
$ node hi-node.js
ConsoleZ, create interactive scripting shells
Another great feature of ConsoleZ is because it offers separate, tabbed environments you can use it as an interactive programming tool.
In ConsoleZ do the following.
- menu > Edit > Settings > Tabs > Add
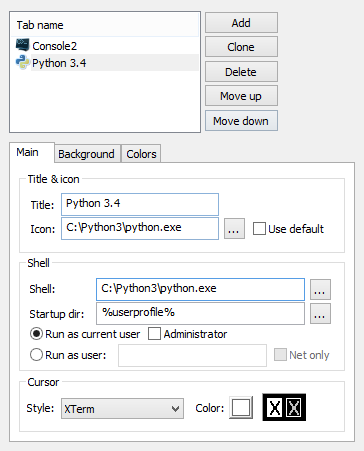
In the Main tab change the Title value to Python 3
Point the Shell to the language interpreter. For a default Python 3 installation I have it pointed to c:\python3\python.exe.
Under Main you can set the Icon value which usually should be the same as the Shell value.
When done, press OK and you now have a new Interactive Python shell tab accessible from ConsoleZ.
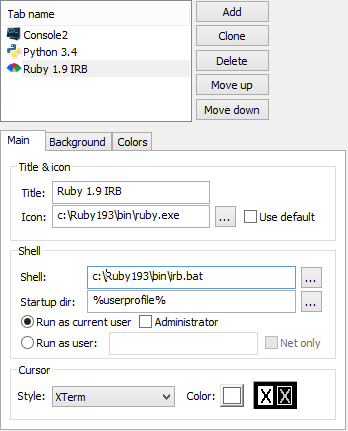
For an interactive Ruby shell you need to set the Shell value to c:\ruby193\bin\irb.bat (or wherever your Ruby installation is located). And you probably want to set the Icon to c:\ruby193\bin\ruby.exe.
ConsoleZ and PowerShell
UPDATE: As of late 2016, Windows 10+ uses PowerShell as the default system shell, so this chapter is redundant.
While this guide mostly uses the standard CMD.EXE shell. Microsoft provides an alternative, feature rich and overall better shell known as PowerShell. PowerShell is an optional download for most consumer versions of Windows and offers a more powerful and complicated command-line. Fortunately PowerShell can also easily be incorporated into ConsoleZ.
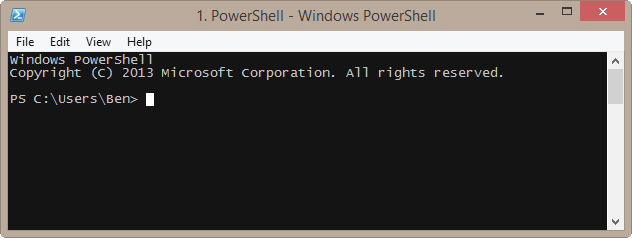
Within ConsoleZ do the following.
- menu > Edit > Settings > Tabs > Add
Add a new tab and set the Title: to PowerShell.
Set the Shell: value to %SystemRoot%\system32\WindowsPowerShell\v1.0\powershell.exe
Set the Icon: to use that same file path.
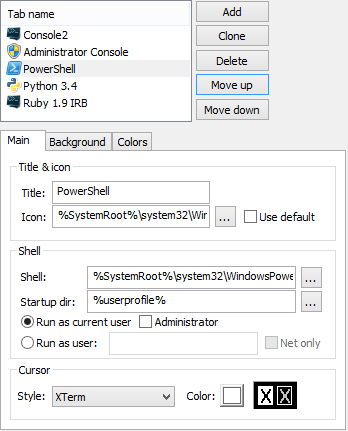
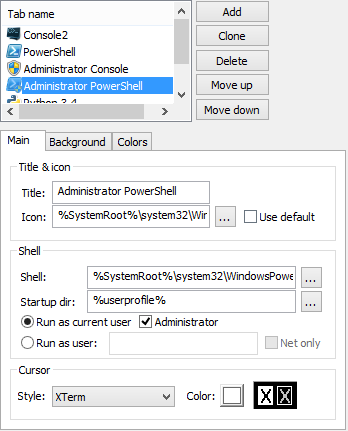
If you want you can also create an administration version of this tab. Select your newly created PowerShell tab and click the Clone button. Change the Title: to Administrator PowerShell and the Icon: to use the PowerShell icon with Administrator shield. Finally make sure the Run as current user option also has the Administrator check-box checked.
Done!
Congratulations, you’re done. The GitHub repository for the code for this article: https://github.com/bengarrett/devtidbits.com/tree/main/post_1226.
Written by Ben Garrett
