Create self-signed certificates
for HTTPS with Apache Tomcat
3 minutes
Tip using Ko-fi or Buy Me a Coffee
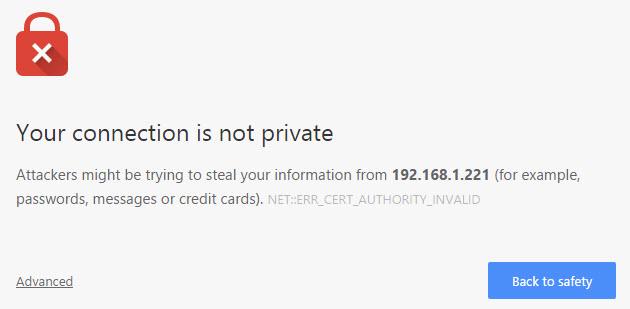
This entry will guide through the process of creating a self-signed certificate to use on an Apache Tomcat 7 or 8 HTTPS connector. Self-signed certificates allow secure, encrypted HTTPS connections but are not certified by any trusted certificate authority. So first time client connections will receive all kinds of warnings from their web browser. Because of this they are not recommended for use in production environments but are useful for secure LAN traffic or testing HTTPS configurations.
I am using Ubuntu 14.04 LTS and Tomcat 7 but this setup should be similar for other distributions.
Create a keystore and certificates
Firstly create and secure a directory to hold our certificates for Tomcat.
sudo mkdir /etc/ssl/tomcat
sudo chown :ssl-cert /etc/ssl/tomcat
sudo chmod 755 /etc/ssl/tomcat
Next we are going to create a 2048-bit RSA key and use it to generate an X509 self-signed certificate. Note the -days argument hard codes a usable duration value into the certificate. A argument of of -days 365 means the certificate is valid for a year.
In the code examples you can replace “example” with a domain or site name of your choosing such as localhost or mydomain.com.
sudo openssl req -newkey tomcat:2048 -nodes -keyout /etc/ssl/tomcat/example.key -x509 -days 365 -out /etc/ssl/tomcat/example.crt
You’ll be prompted for some optional organisation information which you can skip by pressing Enter at each prompt.
Next we bundle the certificate into a PKS12 keystore so we can use it in a Tomcat BIO or NIO HTTPS connector.
sudo openssl pkcs12 -inkey /etc/ssl/tomcat/example.key -in /etc/ssl/tomcat/example.crt -export -out /etc/ssl/tomcat/example.pfx
When prompted set an Export Password and then confirm it. For my examples I will use the password changeit.
Create a Connector
Now we will create a HTTPS connector that will use your self-signed certificate.
sudo nano -B /etc/tomcat7/server.xml
Find and uncomment a connector similar to the following…
<Connector port="8443" protocol="HTTP/1.1" SSLEnabled="true"
    maxThreads="150" scheme="https" secure="true"
    clientAuth="false" sslProtocol="TLS" />
Add to it the following attributes.
keystoreFile="/etc/ssl/tomcat/example.pfx"
keystoreType="PKCS12"
keystorePass="changeit"
Your updated connector should look similar to the following.
<Connector port="8443" protocol="HTTP/1.1" SSLEnabled="true"
    maxThreads="150" scheme="https" secure="true"
    clientAuth="false" sslProtocol="TLS"
    keystoreFile="/etc/ssl/tomcat/example.pfx"
    keystoreType="PKCS12"
    keystorePass="changeit" />
Save your changes and exit nano. Now reboot Tomcat to apply your changes.
sudo service tomcat7 restart
Point a web browser to your Tomcat webserver but append port 8443 to the URL like so. https://192.168.1.221:8443 or https://www.example.com:8443 etc.
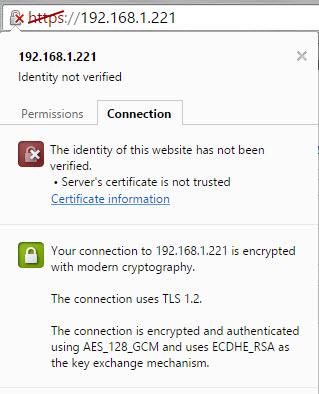
You should receive a warning from your browser but you can ignore these and proceed with the connection.

Congratulations you’re viewing your Tomcat served website over an encrypted HTTPS connection. If the connection over HTTPS didn’t work but you can still connect using standard HTTP. Then you best check your Tomcat logs for any configuration errors.
tail -n 100 catalina.out | less
Configure Tomcat to use port 443 (HTTPS default)
If you want to use HTTPS without the need to append :8443 to the end of the URL then we have to bind port 443 (the default HTTPS port) to Tomcat.
sudo touch /etc/authbind/byport/443
sudo chmod 500 /etc/authbind/byport/443
sudo chown tomcat7 /etc/authbind/byport/443

sudo nano -B /etc/default/tomcat7
Scroll to the end of the file and add or change …
AUTHBIND=yes
Save your changes and exit.
Edit Tomcat’s HTTPS connector to use port 443.
sudo nano /etc/tomcat7/server.xml
Change <Connector port="8443" to <Connector port="8443".
Save, exit and restart Tomcat.
sudo service tomcat7 restart
Congratulations now point a web browser to your Tomcat web server using only a https:// prefix such as. https://192.168.1.221 or https://www.example.com.

Written by Ben Garrett
