Add to and change Ubuntu's MOTD
Learn how to modify, disable or add to the Ubuntu terminal, Message of the Day.
7 minutes
28 Oct 2022: Article tested with Ubuntu 22.04 and replaced screenshots with text
30 Nov 2015: Initial publication for Ubuntu 14.04
Tip using Ko-fi or Buy Me a Coffee
Ubuntu’s Message Of The Day, or MOTD, is the name given to the welcome screen users see when they login to a Ubuntu server using a remote terminal.
Welcome to Ubuntu 14.04.3 LTS (GNU/Linux 3.13.0-24-generic x86_64)

 * Documentation https://helpubuntu.com/
Welcome to Ubuntu 22.04.1 LTS (GNU/Linux 5.15.0-52-generic x86_64)

 * Documentation:  https://help.ubuntu.com
 * Management:     https://landscape.canonical.com
 * Support:        https://ubuntu.com/advantage
The output looks like a basic text file but is a collection of modular shell scripts running. In this entry, I explain how to add, edit and remove parts of the MOTD and apply color text and ASCII art. The process covered works with Ubuntu 14.04+ and is tested on Ubuntu 22.04.

MOTD scripts?
As I mentioned, the MOTD comprises a collection of shell scripts that run in sequential order. Locating these scripts is at /etc/update-motd.d/, so let’s look inside.
$ ls /etc/update-motd.d/

00-header             85-fwupd                   91-release-upgrade      98-fsck-at-reboot
10-help-text          88-esm-announce            92-unattended-upgrades  98-reboot-required
50-landscape-sysinfo  90-updates-available       95-hwe-eol
50-motd-news          91-contract-ua-esm-status  97-overlayroot
The filenames use names with an NN-description syntax, where NN is the ascending start order.
The 00-header file is the starter script.
A look into one of the files shows they are indeed shell scripts.
$ cat /etc/update-motd.d/00-header

#!/bin/sh
#
#    00-header - create the header of the MOTD
#    Copyright (C) 2009-2010 Canonical Ltd.
#
#    Authors: Dustin Kirkland <[email protected]>
#    ...

[ -r /etc/lsb-release ] && . /etc/lsb-release

if [ -z "$DISTRIB_DESCRIPTION" ] && [ -x /usr/bin/lsb_release ]; then
	# Fall back to using the very slow lsb_release utility
	DISTRIB_DESCRIPTION=$(lsb_release -s -d)
fi

printf "Welcome to %s (%s %s %s)\n" "$DISTRIB_DESCRIPTION" "$(uname -o)" "$(uname -r)" "$(uname -m)"
You can also run the script from terminal.
$ /etc/update-motd.d/./00-header

Welcome to Ubuntu 22.04.1 LTS (GNU/Linux 5.15.0-52-generic x86_64)
Disabling MOTD scripts
Turning off one or more scripts is simple as removing the execute permissions bit from the target. Here we will turn off the script that posts the Documentation link.
$ cd /etc/update-motd.d/
$ sudo chmod -x 10-help-text
Use the run-parts command to see your changes.
$ sudo run-parts /etc/update-motd.d

Welcome to Ubuntu 22.04.1 LTS (GNU/Linux 5.15.0-52-generic x86_64)

  System information as of...
And if you wish to return the script to the MOTD, re-add its execute bit.
$ sudo chmod +x 10-help-text
$ run-parts /etc/update-motd.d

Welcome to Ubuntu 22.04.1 LTS (GNU/Linux 5.15.0-52-generic x86_64)

 * Documentation:  https://help.ubuntu.com
 * Management:     https://landscape.canonical.com
 * Support:        https://ubuntu.com/advantage

  System information as of...
Editing MOTD scripts
I don’t recommend editing the system-installed scripts directly. Instead, I think it’s better to disable, duplicate and edit the copy. This way, you can always revert to the original script if necessary.
Here let’s change the 00-header to simplify its version output. But first, we need to copy and disable the system original.
$ cd /etc/update-motd.d/
$ sudo cp 00-header 01-header-custom
$ sudo chmod -x 00-header
Edit the custom header to make some modifications.
$ sudo nano 01-header-custom
Replace the line Welcome to line with something simpler.
 1[ -r /etc/lsb-release ] && . /etc/lsb-release
 2
 3if [ -z "$DISTRIB_DESCRIPTION" ] && [ -x /usr/bin/lsb_release ]; then
 4        # Fall back to using the very slow lsb_release utility
 5        DISTRIB_DESCRIPTION=$(lsb_release -s -d)
 6fi
 7
 8# Comment out the original message
 9#printf "Welcome to %s (%s %s %s)\n" "$DISTRIB_DESCRIPTION" "$(uname -o)" "$(uname -r)" "$(uname -m)"
10
11# Replacement message
12printf "Welcome to %s\n" "$DISTRIB_DESCRIPTION"
A little explainer on the code, printf runs the print format command, %s is where to output the string value of $DISTRIB_DESCRIPTION and \n is to print a new line.
Save and exit.
$ sudo run-parts /etc/update-motd.d

Welcome to Ubuntu 22.04.1 LTS

 * Documentation:  https://help.ubuntu.com
 * Management:     https://landscape.canonical.com
 * Support:        https://ubuntu.com/advantage
If you want to revert your changes to the default, overwrite it with the original system file.
$ sudo cp 00-header 01-header-custom
$ sudo run-parts /etc/update-motd.d

Welcome to Ubuntu 22.04.1 LTS (GNU/Linux 5.15.0-52-generic x86_64)

 * Documentation:  https://help.ubuntu.com
 * Management:     https://landscape.canonical.com
 * Support:        https://ubuntu.com/advantage
Creating MOTD scripts
Adding new scripts to the MOTD is a simple process. Let’s start with a hello world example. First, we will create a script with the name 30-hello-world, which launches after the 00-header and 10-help-text scripts.
$ cd /etc/update-motd.d/
$ sudo nano 30-hello-world
Add the following to the file. We use the printf command to handle text output while \n tells the shell to print a new line.
1#!/bin/sh
2printf "\nHello world.\n"
Save and exit. Now add the execute permission and test the file.
$ sudo chmod +x 30-hello-world
$ sudo run-parts /etc/update-motd.d

Welcome to Ubuntu 22.04.1 LTS (GNU/Linux 5.15.0-52-generic x86_64)

 * Documentation:  https://help.ubuntu.com
 * Management:     https://landscape.canonical.com
 * Support:        https://ubuntu.com/advantage

Hello world.
Color the text
I use the tput command included in a default Ubuntu install for color support. It allows you to color text and apply styles, centering, cursor movement and clear the screen. For our purposes of coloring text, tput supports the adjustment of both foreground and background colors using ANSI escape codes.
Set the foreground. Note that x is a numeric placeholder for a color code value.
tput setaf x
Set the background.
tput setab x
Resets the colours to the terminal defaults.
tput sgr0
tput x colour codes.
0black1red2green3yellow4blue5magenta6cyan7white
So tput setaf 7 sets the foreground to white, and then tput setab 2 sets a green background. tput setaf 4 would set the foreground to blue.
Tput relies on the $TERM user environment variable to determine the terminal type.
Unfortunately, this variable only appears once when a user logs on after the display of the MOTD. So whenever we use tput, we need to force it to use xterm using the type of terminal -T argument.
$ sudo nano 30-hello-world
Append the marked echo command to the file, save and test.
1#!/bin/sh
2printf "\nHello world.\n"
3echo "$(tput -T xterm setaf 1)Hello world$(tput -T xterm sgr0) in red."
Now, if you run sudo run-parts /etc/update-motd.d, you’ll see the words Hello world in red and the remaining text the terminal default colors.

Now edit the file again and append the following, save and test.
1#!/bin/sh
2printf "\nHello world.\n"
3echo "$(tput -T xterm setaf 1)Hello world$(tput -T xterm sgr0) in red."
4echo "$(tput -T xterm setaf 4)$(tput -T xterm setab 7)White background and blue foreground.$(tput -T xterm sgr0)"
5echo "$(tput -T xterm rev)Reverse normal text.$(tput -T xterm sgr0)"
$ sudo run-parts /etc/update-motd.d

To learn more about what you can do using the tput command, I’d recommend the following guides.
Printing text files
Outputting a text file is a simple process, and there are a few ways of doing it. I generally save the text file into the /etc/update-motd.d and use the cat command from within a script to display it onscreen.
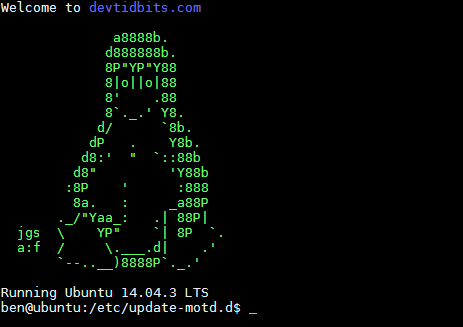
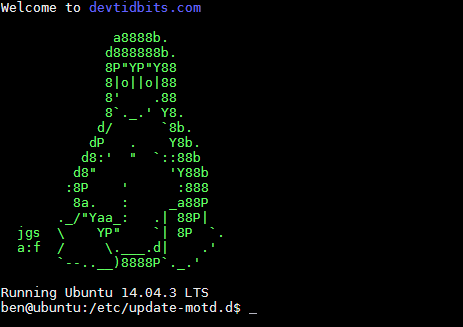
Copy, paste, and save this Tux logo I sourced from Chris.com.
$ sudo nano /etc/update-motd.d/tux.asc
 1            a8888b.
 2           d888888b.
 3           8P"YP"Y88
 4           8|o||o|88
 5           8'    .88
 6           8`._.' Y8.
 7          d/      `8b.
 8         dP   .    Y8b.
 9        d8:'  "  `::88b
10       d8"         'Y88b
11      :8P    '      :888
12       8a.   :     _a88P
13     ._/"Yaa_:   .| 88P|
14jgs  \    YP"    `| 8P  `.
15a:f  /     \.___.d|    .'
16     `--..__)8888P`._.'
Create a 20-display-logo file, add and save the following script.
$ sudo nano /etc/update-motd.d/20-display-logo
1#!/bin/sh
2printf "\n$(cat /etc/update-motd.d/tux.asc)\n"
Finally, apply the execute bit and test out the changes.
$ sudo chmod +x /etc/update-motd.d/20-display-logo
$ sudo run-parts /etc/update-motd.d

Welcome to Ubuntu 22.04.1 LTS (GNU/Linux 5.15.0-52-generic x86_64)

 * Documentation:  https://help.ubuntu.com
 * Management:     https://landscape.canonical.com
 * Support:        https://ubuntu.com/advantage

            a8888b.
           d888888b.
           8P"YP"Y88
           8|o||o|88
           8'    .88
           8`._.' Y8.
          d/      `8b.
         dP   .    Y8b.
        d8:'  "  `::88b
       d8"         'Y88b
      :8P    '      :888
       8a.   :     _a88P
     ._/"Yaa_:   .| 88P|
jgs  \    YP"    `| 8P  `.
a:f  /     \.___.d|    .'
     `--..__)8888P`._.'

Hello world.
Hello world in red.
White background and blue foreground.
Reverse normal text.
Now feel free to use what you have learned to clean up the modifications and produce a more excellent login.
You’ll probably want to delete 30-hello-world.
$ sudo rm /etc/update-motd.d/30-hello-world
Perfect and that is it for this guide, I hope it was useful.

Written by Ben Garrett
