Turn a Raspberry Pi into an always on Bittorrent client
with Snappy Ubuntu Core
9 minutes
August 2016: This guide is for the late-2015’s release of Ubuntu Core for Raspberry Pi 2 that is based Ubuntu 15.04. Canonical has since made that release redundant with their newer Ubuntu Classic for Raspberry Pi 2 which is based on Ubuntu 16.04. Unfortunately the instructions below do not work with Ubuntu Classic.
Tip using Ko-fi or Buy Me a Coffee
In this guide, I will walk you through on how to easily turn your Raspberry Pi into a dedicated, always on BitTorrent client.
The Pi is low powered, quiet and makes a perfect candidate for this task. What makes this walkthrough unique though is we will use Snappy Ubuntu Core to create an Internet of Things like device which should involve very little maintenance or setup.
Snappy Ubuntu Core is a new rendition of Ubuntu with transactional updates – a minimal server image with the same libraries as today’s Ubuntu, but applications are provided through a simpler mechanism. https://developer.ubuntu.com/en/snappy/
Snappy is a new type of software package that has a number of advantages which share similar traits to other mobile operating systems such as iOS and Android.
- Snappy packages are self-contained with all the dependencies included so they are not bound to particular OS editions. Packages are isolated from the core operating system which is also read-only! This should improve the security of the device and reduce user introduced security deficiencies.
- The downside, there is usually only one way to do a particular task which goes against the Linux ethos of limitless customizations. And what you can do with the system is severely limited compared to a standard Linux setup. But for our task Snappy Ubuntu Core is quite suitable for our needs.
This guide will also assume you are somewhat experienced with a terminal and also setting up a Raspberry Pi.
Snappy Ubuntu Core installation
Firstly you need to install Ubuntu Core onto an SD card for use in your Pi. Archive.org has a mirror of the instructions for Getting started with a Raspberry Pi 2 that has details on how to install Ubuntu Core for Linux, Windows and Mac users.
Don’t forget to take note of the Log into Ubuntu Core chapter which contains the user login details. Once complete your Pi should be up and running Snappy Ubuntu Core with yourself logged in as user ubuntu. Either physically using a keyboard/display or remotely over SSH.
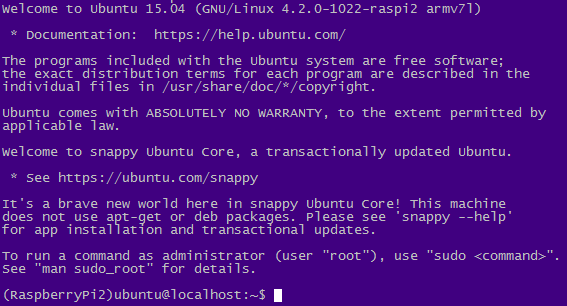
For the most part, Snappy Ubuntu Core looks the same as a standard headless install, except for two key differences.
The first is that root / is read-only and is not user or app modifiable. All modifiable data is now stored in and linked to /writable.
$ sudo touch /etc/test.conf

touch: cannot touch '/etc/test.conf': Read-only file system
The second is that the standard apt-get package management software is gone and has been replaced by snappy.
$ apt-get

Ubuntu Core does not use apt-get, see 'snappy --help'!
From an end user perspective, Snappy works in much the same way as AptGet.
snappy --help
Lists all the available snappy commands.
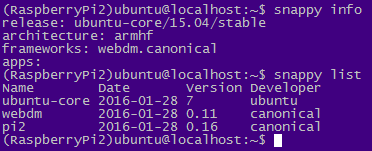
snappy info
Breaks down the operating system and its packages.
snappy list
Lists all installed packages, their versions and publish dates.
sudo snappy update
Updates all the installed packages and the Snappy Ubuntu Core operating system!
Reboot to use the new ubuntu-core.
sudo reboot
You will probably be prompted to reboot after an OS update.
Install a BitTorrent daemon
sudo snappy install transmission
Once done that is it, you now have a fully functioning BitTorrent box running on your local network!
Point a web browser using your desktop to http://webdm.local:9091/
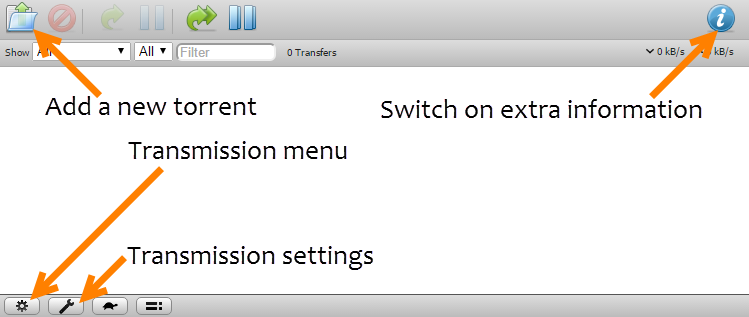
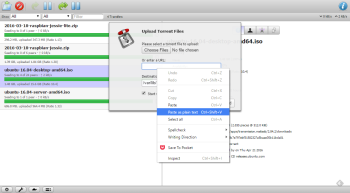
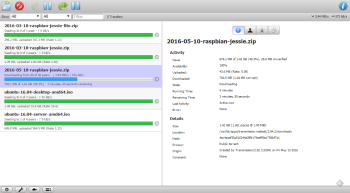
All Transmission‘s downloads are saved to your Pi and can be found at*:
/var/lib/apps/transmission.matiasb/current/downloads/
The .torrent files are in:
/var/lib/apps/transmission.matiasb/current/torrents/
Transmission’s configuration file is a JSON document located at:
/var/lib/apps/transmission.matiasb/current/settings.json
Transmission’s statistic file as a JSON document*:
/var/lib/apps/transmission.matiasb/current/stats.json
*This may not exist until after you initiate an open torrent.
To make things easier create some symlinks in your home directory.
cd ~
ln -s /var/lib/apps/transmission.matiasb/current/downloads/ downloads
ln -s /var/lib/apps/transmission.matiasb/current/torrents/ torrents
ln -s /var/lib/apps/transmission.matiasb/current/settings.json settings.json
ln -s /var/lib/apps/transmission.matiasb/current/stats.json stats.json
Most of what you need to configure can be done using the Transmission web interface. But if you do need to edit the configuration JSON file, unfortunately, you are limited to the Vim text editor. Later on, I will show how to hack in a copy of nano if it is wanted.
sudo cat ~/settings.json
To access your Transmission downloads from other computers in your home network we can use SFTP as the default ubuntu account is preconfigured with access.
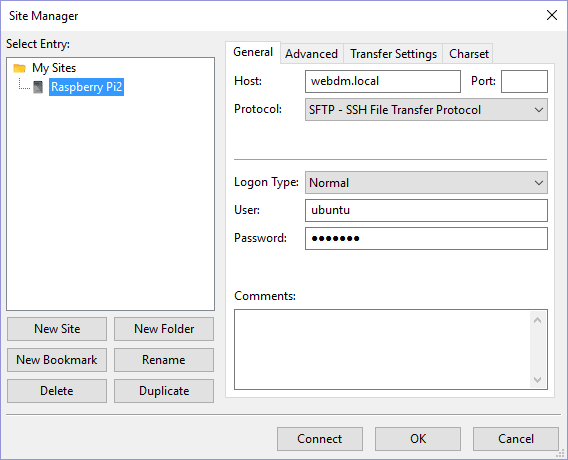
For desktop Windows users, you can use a graphical SFTP client such as FileZilla. Those who require sftp for the command prompt, I recommend OpenSSH for Windows ported by mls-software or Chocolatey users can do choco install mls-software-openssh.
If you’re using a sftp client from a desktop terminal or command prompt.
sftp [email protected]:downloads/
ls
Connects to the Transmission downloads directory and lists its content.
get ubuntu-16.04-desktop-amd64.iso
Downloads the file to your desktop.
get -r directory/
Downloads a directory with its content to your desktop.
get -r *
Downloads everything, the entire downloads/ directory and all its files and subdirectories to your desktop.
Security
Finally, you may want to change the default password of the ubuntu account on your Pi. As the file system is read-only we have to unlock it before running the passwd command. The following command sequence sets the file system to read-write; runs the passwd command to prompt for your new user password; then returns the file system to a read-only state.
sudo mount -o remount,rw /; passwd; sudo mount -o remount,ro /
Also, it’s best to double check that your Pi’s Transmission web interface isn’t accessible outside of your local network.
Get your internet facing IP address by visiting IP Echo in a web browser. http://ipecho.net/
Then run the returned IP address appended with the :9091 port in a web browser. For example, if ipecho.net returned 203.0.113.0 the URL would be http://203.0.113.0:9091.
This should fail to connect. Which is good as it means port 9091 is not being shared outside of your local network.
This site can’t be reached
203.0.113.0 refused to connect.
Otherwise, if the connection works then your internal home network might be misconfigured. You’d best unplug your Pi until you get the issue fixed.
We are done, congratulations you now have a dedicated, always on BitTorrent client idling on your local network.
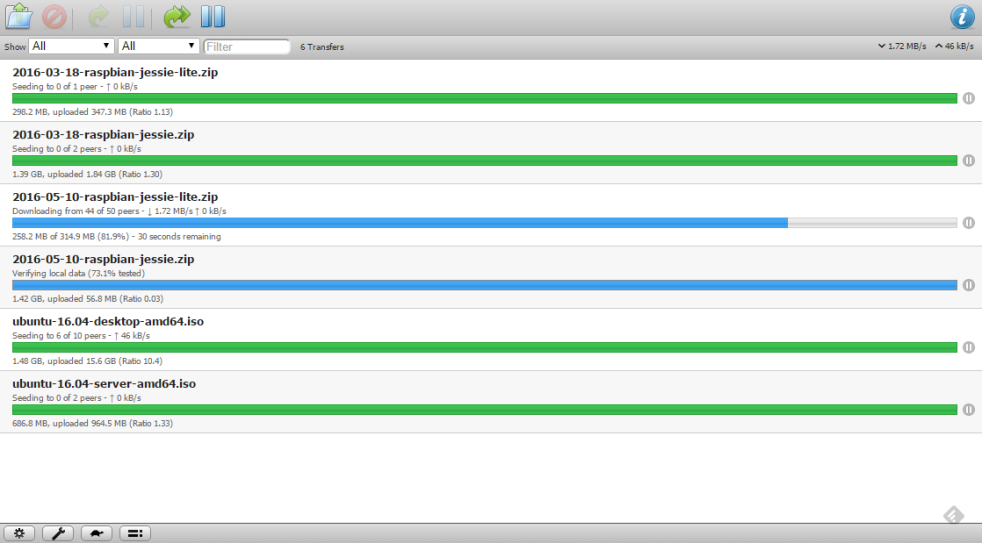
Bonus Appendix Items
Here I cover a few more optional configurations to the Pi which include installing the nano text editor, changing the hostname and attaching a removable hard drive.
Appendix 1: Installing nano on Snappy Ubuntu Core
Installing nano requires a workaround that necessitates installing nano for armhf and all its dependencies using the dpkg package manager. On your desktop download the following files, preferably to an empty subdirectory.
Note these links use the Debian USA mirrors. These can be changed to ftp.uk.debian.org, ftp.de.debian.org, ftp.ca.debian.org, etc. A full list of international mirrors can be found.
- http://ftp.us.debian.org/debian/pool/main/n/nano/nano_2.5.3-3_armhf.deb
- http://ftp.us.debian.org/debian/pool/main/g/gcc-6/libgcc1_6.1.1-1_armhf.deb
- http://ftp.us.debian.org/debian/pool/main/g/gcc-6/gcc-6-base_6.1.1-1_armhf.deb
- http://ftp.us.debian.org/debian/pool/main/n/ncurses/libncursesw5_6.0+20160319-1_armhf.deb
- http://ftp.us.debian.org/debian/pool/main/n/ncurses/libtinfo5_6.0+20160319-1_armhf.deb
- http://ftp.us.debian.org/debian/pool/main/g/glibc/multiarch-support_2.22-7_armhf.deb
- http://ftp.us.debian.org/debian/pool/main/z/zlib/zlib1g_1.2.8.dfsg-2+b1_armhf.deb
On your Pi create a subdirectory in your home directory called nano.
mkdir ~/nano
Upload the 7 downloaded .deb files located on your desktop to your Pi either using FileZilla or SCP.
scp *.deb [email protected]:~/nano/
On the Pi run the following to install nano.
cd ~/nano/
sudo mount -o remount,rw /;sudo dpkg -i *.deb
sudo mount -o remount,ro /
When you try to remount, the file system to read only you will probably receive the following error:
mount: / is busy
The simplest solution is to reboot the Pi and rerun the command afterward.
sudo reboot
Wait, login then run.
sudo mount -o remount,ro /
Otherwise hopefully, nano is now installed and working!
$ nano -V

GNU nano, version 2.5.3
(C) 1999..2016 Free Software Foundation, Inc.
Appendix 2: Change Snappy Ubuntu Core’s hostname
If you care to use a more memorable address than webdm.local for your HTTP, SCP and SFTP connections we can change the hostname. I will switch my address to torrentbox but you can choose whatever name takes your fancy.
First, unlock the file system.
sudo mount -o remount,rw /
Backup the files we are to modify.
cd /etc/
sudo cp hosts hosts.original
sudo cp hostname hostname.original
Edit hosts.
sudo nano hosts
Comment out the first line.
#127.0.0.1 localhost.localdomain localhost
Insert the following.
127.0.0.1 torrentbox
Save and exit.
Edit hostname.
sudo nano hostname
Delete.
localhost.localdomain
Insert the following.
torrentbox
Save and exit.
Reboot the Pi then once logged in, lock the file system.
sudo reboot
sudo mount -o remount,ro /
Once finished, point your desktop browser to http://torrentbox:9091 and you are done!
ssh ubuntu@torrentbox should work for secure shell connections.
Appendix 3: Attaching a removable hard drive
f you wish to attach a removable hard drive to the Pi. I’d recommend a 2.5″ SSD housed in a powered USB enclosure as they are affordable and silent.
Window and OS X users should note that Snappy Ubuntu Core can read Windows FAT32 formatted drives but not exFAT, NTFS or HFS+. You can read a comparison guide of the different Windows formats at NTFS vs FAT vs exFAT. Note that FAT32 has a 4GB size limit on individual files!
If you plan to use FAT32 I’d recommend formatting the partitions in Linux rather than under Windows which may have additional format restrictions.
Plug your drive into your Raspberry Pi. If it is powered and operating correctly run the following commands to mount it.
cd /var/lib/apps/transmission.matiasb/current/downloads
sudo mkdir usbdrive
sudo mount /dev/sda1 usbdrive
Traditionally with Ubuntu, you mount an external drive to a directory in /mnt or your home. But Snappy apps do not have write access to these or other directories so Transmission will not be able to save files into them.
Note some drives may have multiple partitions which you can check for using this command.
sudo lsblk /dev/sda
On this example output, I have 2 partitions listed, sda1 and sda2. In which case I would want to instead mount the much larger 55.4 GB sda2 partition.
sda 8:0 0 55.9G 0 disk
├─sda1 8:1 0 512M 0 part
└─sda2 8:2 0 55.4G 0 part
Once mounted you can list its content.
ls /var/lib/apps/transmission.matiasb/current/downloads/usbdrive
We can also link it in our home directory.
ln -s /var/lib/apps/transmission.matiasb/current/downloads/usbdrive ~/usbdrive
To format a partition while it is connected to the Pi.
If you’re only ever using your drive with Linux desktops and the Raspberry Pi.
sudo umount /dev/sda1; sudo mkfs.ext4 /dev/sda1 -L RASPBERRYPI
Otherwise, if you need compatibility with Windows and OS X machines.
sudo umount /dev/sda1; sudo mkfs.vfat /dev/sda1 -n RASPBERRYPI
When the formatting is complete remount the partition.
sudo mount /dev/sda1 /var/lib/apps/transmission.matiasb/current/downloads/usbdrive
To see technical details on your Raspberry Pi drives (both the USB and SD card).
sudo fdisk -l
To see the usable free space on the partition.
df -h /var/lib/apps/transmission.matiasb/current/downloads/usbdrive or df -h ~/usbdrive
Always unmount the drive‘s partitions before you unplug it from a powered Pi.
sudo umount /dev/sda1
Written by Ben Garrett
