Easily create a NAS with a Raspberry Pi
or another ARM single-board computer
13 minutes
Tip using Ko-fi or Buy Me a Coffee
As of writing in October 2018, there is a price sweet spot for 200GB microSD cards that retail for $44USD. Combined with a Raspberry Pi, they allow the build of a relatively affordable, low powered NAS with a decent storage capacity for a home network — all without the need for external drives, extra cables, or multiple power sockets.
This NAS project will be headless, wired and administered via a web-browser and SSH. I will use OpenMediaVault: a self-contained, modular Debian Linux ecosystem. In this piece, I will explain how to install and configure it to serve SSH, SFTP, BitTorrent, a media and a web server, but it offers even more functionality out of the box.
This article assumes prior knowledge with the Raspberry Pi, basic networking concepts and familiarity with the Linux terminal.
OpenMediaVault running off a Raspberry Pi will make this a slow NAS as the limiting factor is the microSD card, which, while rated for 90 MB/s read speed, would probably only obtain 20% of that while writing. Bearing that in mind, this setup shouldn’t be used as a replacement for DropBox or other cloud file hosting services where you continually write data to the NAS or use on-the-fly encryption.
While this piece will focus on the Raspberry Pi, OpenMediaVault also supports the following ARM-based single board computers, and I’d imagine the installation process would be much the same. NanoPi, NanoPC, Rock64, Libre Computer Roc, Banana Pi, Pine A64, Orange Pi, Odroid and the CubieTruck.
OpenMediaVault image
OpenMediaVault version 4 for Raspberry Pi requires either a model 2B, 3B or 3B+ and at least a 16GB microSD card. I used the slowest supported model, the 2B, and I had no issues with software or UI performance. I also tried with an older Pi 1 B+, but found it wouldn’t boot.
Download the NAS image file and also take note of the readme.txt file: https://sourceforge.net/projects/openmediavault/files/Raspberry%20Pi%20images/
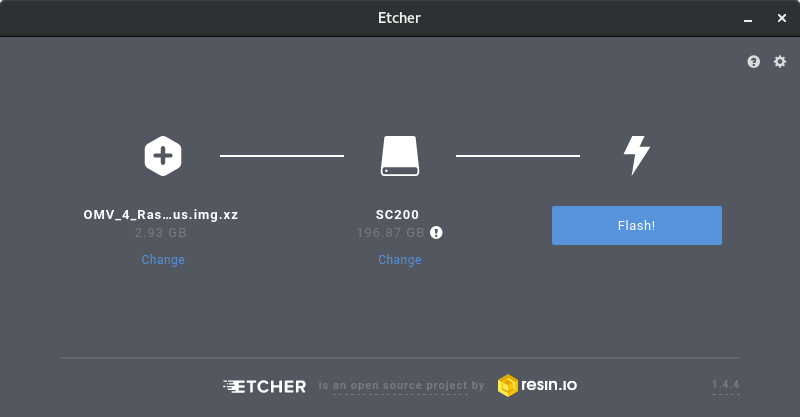
The image file is compressed and should end with a .img.xz file extension. Do not uncompress this; instead, use Etcher to burn the compressed image straight to the microSD card. Etcher is available for Windows, macOS, Linux and offers an easy user interface. Once Etcher is done, it will automatically eject the microSD which will then be ready to insert into the Pi.
First-time boot
Insert the microSD card containing the openmediavault image into your Raspberry Pi –which will also need a monitor and a keyboard connected — then power it. Ignore any Debian GNU/Linux raspberrypi login prompts while running this first-time boot and the installation will continue. After a few minutes, the Raspberry Pi should load the openmediavault 4.x raspberrypi prompt and reveal some system information, such as the device IP address:
openmediavault 4.17 (Arrakis) raspberrypi tty1
Copyright (C) 2009-2018 by Volker Theile. All rights reserved.

To manage the system visit the openmediavault web control panel:
enx????????????: 196.168.1.200
Login as root and use openmediavault as the root password for the first-time login. Here, you’ll be prompted to change your password — be sure to record it! If the login doesn’t work, check the readme.txt just in case the default login/password is different since writing.
Test the Pi’s remote connection to the Internet.
ping -c3 google.com
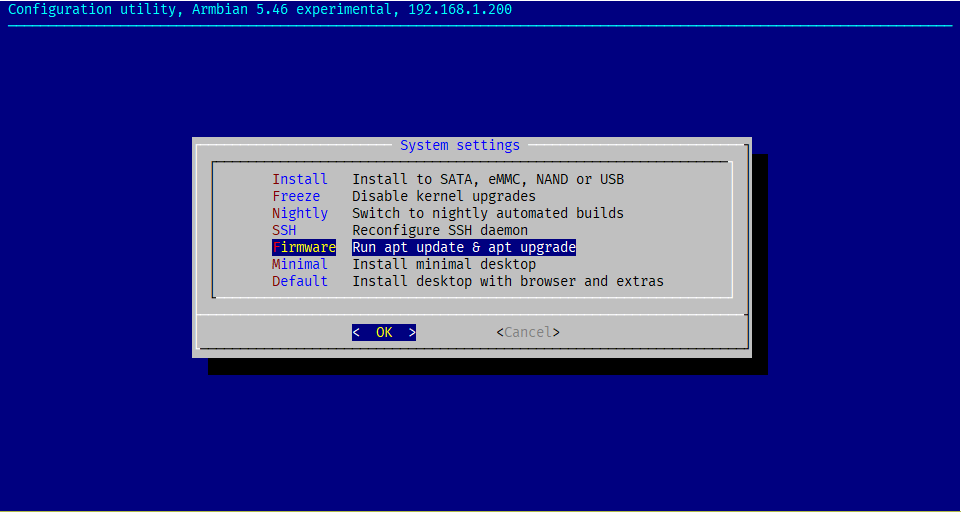
Update the firmware for the Raspberry Pi hardware.
armbian-config
Navigate to, System > Firmware and answer Yes.
Once done, we will move onto the remote login. You can either sign out of the Pi or run the following command to monitor the hardware.
armbianmonitor -m

Stop monitoring using [ctrl]-[c]
Time CPU load %cpu %sys %usr %nice %io %irq CPU
07:26:41: 900MHz 1.54 3% 0% 2% 0% 0% 0% 47.1°C
Remote web access
My Pi is using the IP address 192.168.1.200, so I will be using that address for the rest of this article. In a web browser on another computer, load a new browser tab and point it to your Raspberry Pi.
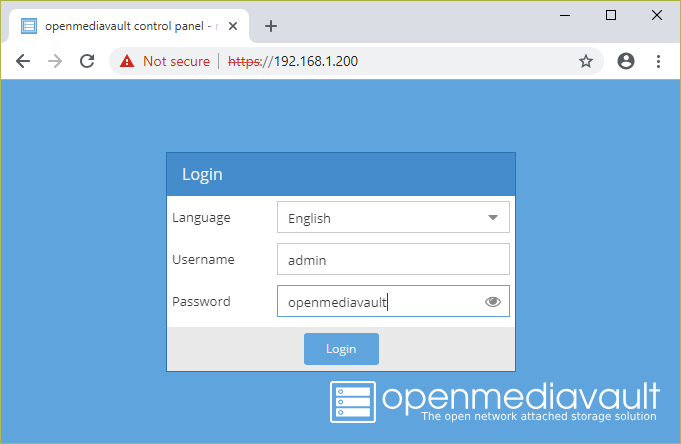
In the control panel, use the admin username and openmediavault as the password. The interface will load the Dashboard and a nice, responsive GUI.
Firstly and most importantly, change the web interface password.
Navigate to: System > General Settings > Web Administrator Password.
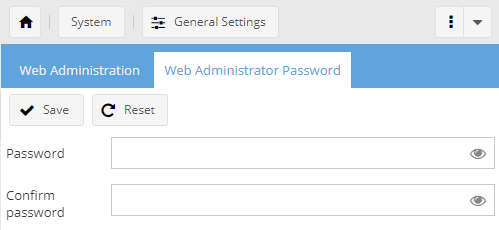
Under the Web Administration tab, change the Auto logout to a higher duration than 5 minutes if you don’t wish to be forced to re-login repeatedly.
Remote SSH access
This next step is optional, but I do recommend it. SSH is on by default, but login in using the root account is disabled. Instead, create a new user for SSH logins and grant it sudo access.
- Navigate to: Access Rights Management > User > Add and select Add
- Fill out the details in the Add user dialogue such as Name (this is your sign-in so keep it lowercase) and Password
- You can select a different shell such as /bin/bash
- Select the Groups tab and check both ssh and sudo under System accounts
- Press Save and Apply
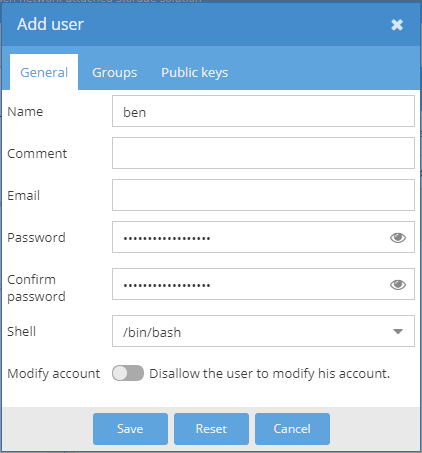
You should be now able to login to the Pi using an SSH client.
You may also wish to create a home directory to keep any shell configurations, make sure to replace the ben username with your own.
sudo mkdir /home/ben/ && sudo chown ben:root /home/ben/
SFTP is also on out of the box!
sftp [email protected]
SSL over HTTP encryption
Now, create an SSL certificate to serve the control panel over encrypted HTTPS.
- Navigate to: System > Certificates > SSL.
- Select: Add > Create.
- In the dialogue, all options can be set to the defaults except Country.
- Save, and when prompted, Apply configuration changes.
To enable the certificate:
- Navigate to: System > General Settings > Web Administration > Secure connection
- Toggle Enable SSL/TLS.
- Choose the new Certificate from the pulldown options.
- You may also wish to toggle Force SSL/TLS later once you can confirm SSL is working
- Press Save and Apply.
Try reloading the browser tab with https://192.168.1.200 instead of http://192.168.1.200.
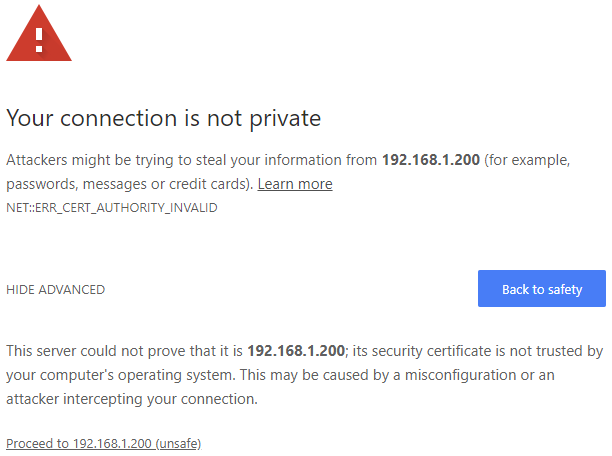
At this point, the browser will notify you that connection is not private. This link is safe as long as the NAS and web control panel are not accessible over the Internet. The interface will be encrypted but the browser doesn’t recognise our self-signed certificate, and so it doesn’t trust the connection.
In Chrome, at the Your connection is not private prompt, select Advanced and Proceed to 192.168.1.200 — or in Firefox, select Advanced and Add Exception.
Update OpenMediaVault
Open Media Vault has its software package management that is accessible through the web control panel.
- Navigate to: System > Update Management > Update.
- Select the Package Information checkbox and then Upgrade.
If you have any issues updating using the interface, you could also try updating through the local terminal.
apt update; apt upgrade -y
Expand the microSD card
Currently, the installation uses a 7GiB allocation of the microSD card. The partition belongs to the operating system and should not host any data that the NAS will serve. That way, if in the future you run out of drive space, the OS will still be able to operate.
Instead, create a new partition that will contain only NAS data and occupy the rest of the microSD. On the local Raspberry Pi terminal or over an SSH connection, run the command:
sudo fdisk -l /dev/mmcblk0
Device Boot Start End Sectors Size Id Type
/dev/mmcblk0p1 8192 137215 129024 63M c W95 FAT32 (LBA)
/dev/mmcblk0p2 137216 15500000 15362785 7.3G 83 Linux
/dev/mmcblk0p3 15500001 380658751 365158751 174.1G 83 Linux
You’ll see three partitions listed on the microSD card.
/dev/mmcblk0p1is the boot partition containing GRUB and should not be touched./dev/mmcblk0p2is the root partition, which is another name for the openmediavault operating system partition./dev/mmcbllk0p3is an unused partition that was created by openmediavault during its first boot up. It is set up as our data partition but needs to be formatted.- Format
/dev/mmcblk0p3using the ext4 file system.
sudo mkfs.ext4 /dev/mmcblk0p3
Return to the control panel.
- Navigate to: Storage > File Systems.
- Select Device /dev/mmcblk0p3 - it should be the last listed item.
- Click the Mount button and then Apply.
Back to the Raspberry Pi terminal.
The partition will be mounted under /srv/.
ls -l /srv/
total 8
drwxr-sr-x 8 root root 4096 Sep 24 09:01 dev-disk-by-id-mmc-?????_??????????-part3/
You may want to make a memorable symbolic link to the partition. For example, to have /mnt/data point to /srv/dev-disk-by-id-mmc-?????_??????????-part3/.
sudo ln -s /srv/dev-disk-by-id-mmc-?????_??????????-part3/ /mnt/data
df -h /mnt/data
Filesystem Size Used Avail Use% Mounted on
/dev/mmcblk0p3 171G 55M 170G 1% /srv/dev-disk-by-id-mmc-?????_??????????-part3
Back in the control panel navigate to: Storage > File Systems. The newly formatted partition should be listed and is ready for use!

Optional NAS services
The final four chapters are optional, so you can pick and choose which features you want. But remember that there is no point running services you don’t intend to use as they’ll only consume more of the Raspberry Pi’s resources, use more power, and just be generally harder to troubleshoot if something goes wrong.
- SSH web-terminal client
- BitTorrent client
- Access files using the web
- Stream movies, music and photos using DLNA.
Besides what is covered here, OpenMediaVault is capable of much more.
- AppleTalk, FTP, NFS, Samba (Windows) file sharing.
- Rsync file and directory synchronisation.
- Remote backup with commercial cloud providers.
- Apple iTunes and AirPlay v1 audio streaming.
- Local DNS and DHCP server.
- MySQL database server.
SSH web-terminal client
An SSH terminal in a browser tab may be useful for some people’s workflows.
- Navigate to: System > Plugins
- In the search box, type shellinabox
- Check the openmediavault-shellinabox package, click Install and then answer Yes at the confirmation prompt
- Once the installation is complete, the package will be accessible
- Navigate to: Services > Shellinabox > General settings, toggle Enable and click Save and Apply
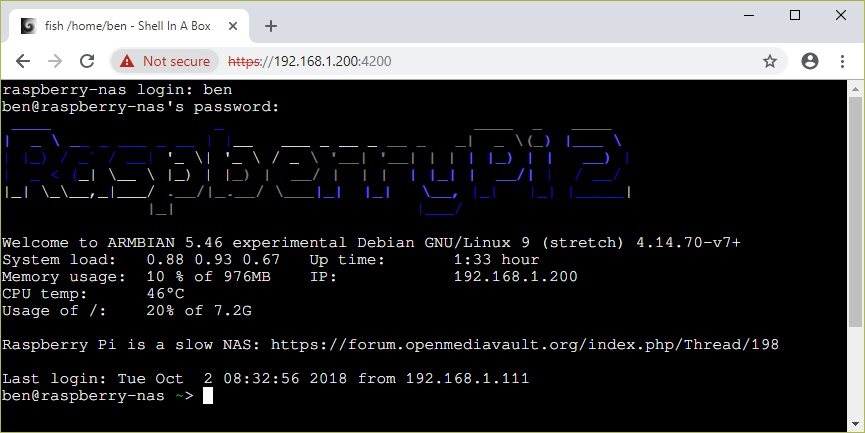
Click the Web Client button that will load a new browser tab and need a new SSL exception. When granted you’ll be at the terminal prompt. If you right-click the browser page, there is a context menu with the option to swap the terminal background/foreground colours.
BitTorrent client
BitTorrent has an infamous reputation, but at the end of the day, it is just a technology –and a useful one, at that.
- Navigate to: System > Plugins
- In the search box, type transmissionbt
- Check the openmediavault-transmissionbt package, click Install and then answer Yes at the confirmation prompt
- Once the installation is complete, the package will be accessible
In an SSH client, create a directory to store the Torrent data.
cd /mnt/data
sudo mkdir linux-distros
sudo chown debian-transmission:debian-transmission linux-distros/
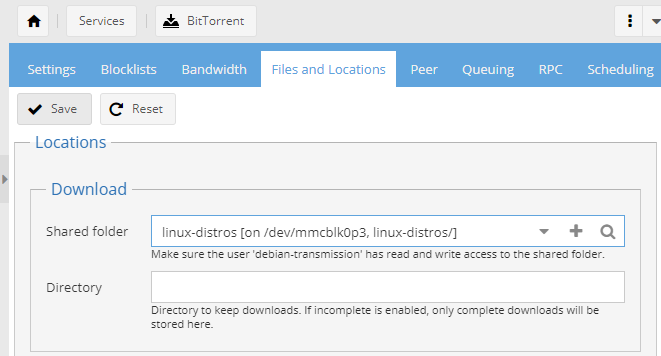
- Navigate to: Services > BitTorrent > Files and Locations.
- Under Locations > Download select the Shared folder and press the big plus + button to .
- On the Add shared folder dialogue set the following:
- Name:
linux-distros - Device:
/devmmcblk0p3 - Path (click the folder icon and Select a directory):
linux-distros/ - Permissions: Administrator: read/write, Users: read/write, Others: read-only
- Save the dialogue.
- Click the Settings tab.
- Under General toggle Enable, then click Save and Apply.
- Navigate to: Access Rights Management > Shared Folders
- Select linux-distros and then click the ACL button
- The most important thing here is to either have the Owner or Group set the debian-transmission with Read/Write/Execute access
- Under Extra options, match the Owner to your SSH user account (ben for me) and grant it Read/Write/Execute
- Under Group match it to debian-transmission and also grant it Read/Write/Execute
- Grant Others Read only access
- Toggle the Replace all existing permissions
- Toggle Recursive apply permissions
- Press Apply and Close
A few options are available to add a new Torrent to the client, but this way is the path of least resistance.
- Navigate to: Services > BitTorrent > RPC
- Add (or keep) the Username and change the Password
- Toggle Enable
- Save and Apply
- Click Show to bring up the Transmission Web Interface or use http://192.168.1.200:9091/transmission/web/ and login
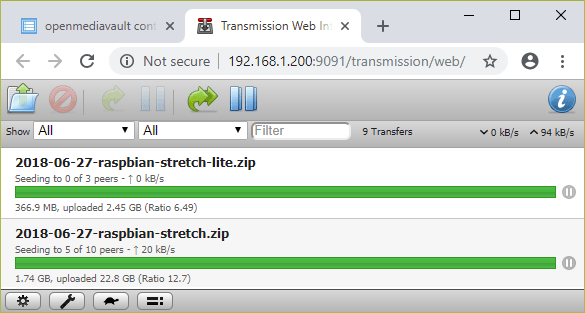
- Click the Open Torrent button at the top-left-most of the page.
- Copy this URL to the Or enter a URL: input and click Upload. https://downloads.raspberrypi.org/raspbian_lite_latest.torrent The torrent should now start and the Raspberry Pi will continue to seed.
- You could also add the full release of Raspbian as well as any of your other favourite Linux distributions. https://downloads.raspberrypi.org/raspbian_latest.torrent
Back in the control panel, there are a couple of other settings you may wish to tweak.
Navigate to: Services > BitTorrent > Settings.
Toggle Local peer discovery (LPD) if you want other BitTorrent clients within your home network to be able to directly to download these torrents over the local network instead of through the Internet.
Change the Cache size (in MB) to a value more significant than the defaults to reduce the number of reads and writes to the microSD card. You could probably safely increase it to 500 MB.
You can always check the Raspberry Pi memory usage. Navigate to: Diagnostics > System Information > Memory usage.
Access files using the web
Instead of implementing complicated, operating system specific network file sharing protocols (Samba, AppleTalk, NFS). The most accessible file sharing service with the least amount of configuration is a web service with the automatic directory listing.
- Navigate to: System > Plugins.
- In the search box type
nginx. - Check the openmediavault-nginx package, click Install and then answer Yes at the confirmation prompt.
- Once the installation is complete, the package is accessible.
- Navigate to: Services > Nginx (websites) and select the Servers tab.
- Click + Add.
- Under General in the Add server dialogue.
- Toggle Enable.
- Click the downward arrowhead ▼ on the Directory and choose linux-distros.
- Toggle Use root.
- Change the Port to 8000 (as port 80 points to the control panel)
- Toggle Default server.
- Under Options, toggle off Use index.
- Toggle Autoindex.
- Click Save and Apply.
Go back to the Settings tab and toggle Enable in the General settings, then click Apply.
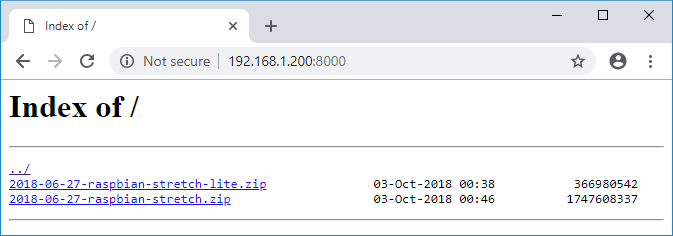
In a new browser tab, you can now visit http://192.168.1.200:8000 to see a list of downloadable files under linux-distros/.
Stream movies, music and photos using DLNA
Most mid and high-end TVs from the past five years and mobile devices can stream multimedia from local networks using the DLNA standards.
- Navigate to: System > Plugins.
- In the search box type
dlna. - Check the openmediavault-minidlna package, click Install and then answer Yes at the confirmation prompt
- Once the installation is complete, the package is accessible.
First, create a shared folder to store the media.
- Navigate to: Access Rights Management > Shared Folders.
- Click + Add to load the Add shared folder dialogue.
- Set the Name to be media.
- Select
/dev/mmcblk0p3as the Device. - The path should be
media/ - The comment could be DLNA steaming.
- Press Save and Apply.
Now, configure the DLNA share.
- Navigate to: Services > DLNA > Shares.
- Click + Add to load the Add media share dialogue.
- Select the media Shared Folder.
- Choose the Content Type or leave it as is.
- Save.
- Select the Settings tab.
- Change the Name to something simple such as OpenMediaVault.
- Toggle Enable under General settings.
- You may also change the Root Container, depending on your media preference.
- Click Save and Apply.
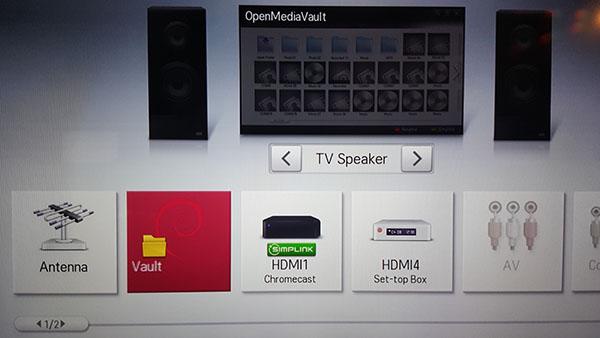
Your media shares have the name OpenMediaVault and are accessible with any DLNA compatible app or device. VLC media player is a popular playback application that supports most platforms and DLNA streams. The mobile apps connected to your LAN should list the share under Local Network.
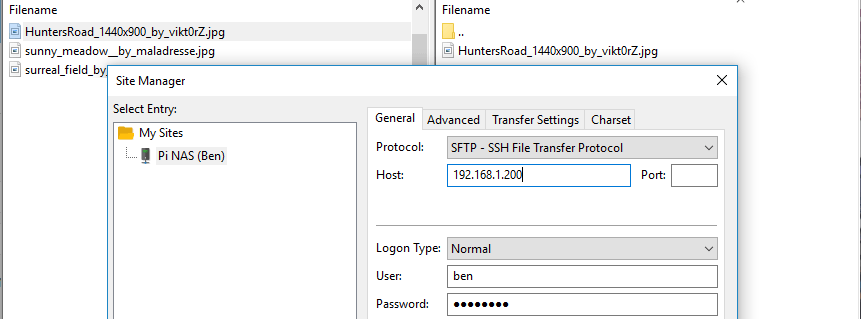
If you want to upload media to stream, the easiest way is to use an SFTP compatible client such as FileZilla. The media share will be located at /srv/dev-disk-by-id-mmc-?????_??????????-part3/media/ or, if you created a symbolic link, /mnt/data/media/.
Written by Ben Garrett
