Customise WordPress on Docker
12 minutes
Tip using Ko-fi or Buy Me a Coffee
In this guide, let’s go through the process of installing and configuring WordPress on a Docker container using docker-compose. The primary goals are to install a bare-bones install with the ability to customise wp-config.php, php.ini and my.cnf. There is an expectation that you are familiar with Docker, WordPress, PHP and MySQL configuration files.
Install WordPress on Docker
On the system hosting Docker, create a working directory for the WordPress installation.
# Create a working directory
$ mkdir example.com

# Change the current working directory
$ cd example.com
Inside the working directory create a docker-compose.yml configuration file for editing. I use Visual Studio Code with the Docker extension, as shown below, but any editor is fine.
# An example command to launch Visual Studio Code
$ code docker-compose.yml
Go to the official page for the WordPress Docker image on Docker Hub. https://hub.docker.com/_/wordpress
Scroll down on the Description tab until you reach via docker stack deploy or docker-compose.
 1version: "3.1"
 2
 3services:
 4  wordpress:
 5    image: wordpress
 6    restart: always
 7    ports:
 8      - 8080:80
 9    environment:
10      WORDPRESS_DB_HOST: db
11      WORDPRESS_DB_USER: exampleuser
12      WORDPRESS_DB_PASSWORD: examplepass
13      WORDPRESS_DB_NAME: exampledb
14    volumes:
15      - wordpress:/var/www/html
16
17  db:
18    image: mysql:5.7
19    restart: always
20    environment:
21      MYSQL_DATABASE: exampledb
22      MYSQL_USER: exampleuser
23      MYSQL_PASSWORD: examplepass
24      MYSQL_RANDOM_ROOT_PASSWORD: "1"
25    volumes:
26      - db:/var/lib/mysql
27
28volumes:
29  wordpress:
30  db:
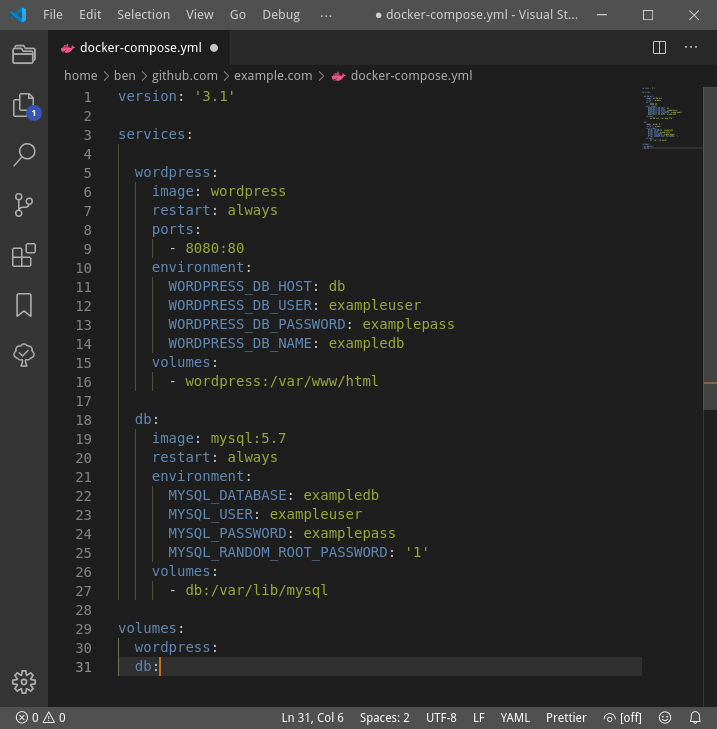
Copy the code block for the Example stack.yml into your editor with docker-compose.yml open and save the file.
Back in the terminal, create and start the newly saved Docker composition.
# Build, create, start and attach the container services
$ docker-compose up
Once ready, the containers return this feedback.
wordpress_1 | Apache/2.4.38 (Debian) PHP/7.3.11 configured -- resuming normal operations
wordpress_1 | Command line: 'apache2 -D FOREGROUND'
A new WordPress installation should be ready at http://localhost:8080. Fill out all the relevant form of information and you’ll be at the WordPress administration page. Congratulations, WordPress is installed!
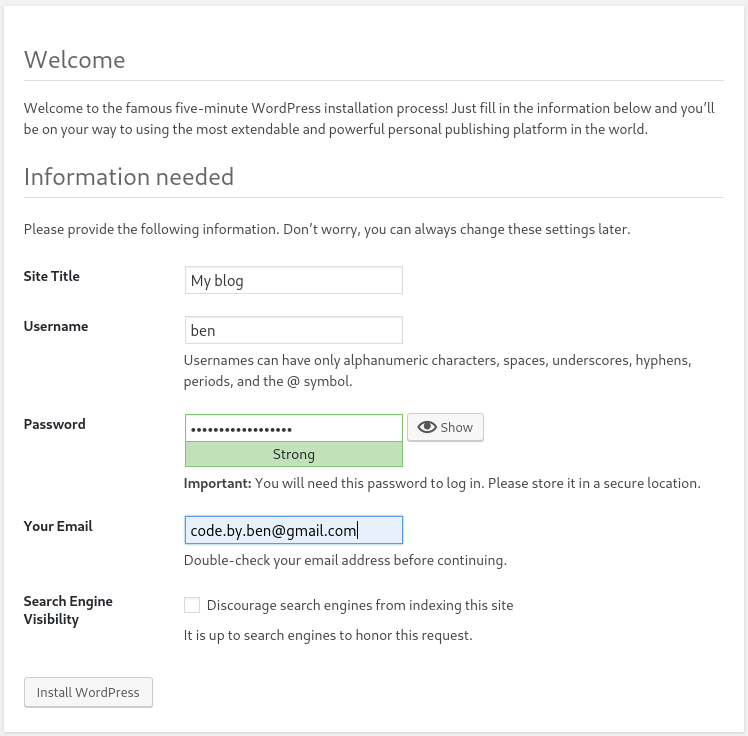
If you have any conflicts or issues with port 8080. Edit docker-compose.yml and change the 8080:80 ports configuration in the WordPress container to a different value such as 8500:80 and run docker-compose up again. You’ll also have to visit the new URL http://localhost:8500.
Reset the WordPress Docker container
If at any time you wish to revert your container to a fresh install you’ll need to remove the storage volumes with these commands. Note, this cannot be undone.
# Stop and remove the containers
$ docker-compose down

# Delete both the wordpress and db file volumes
$ docker volume rm examplecom_db examplecom_wordpress

# Rebuild, recreate, start and attach the container services
$ docker-compose up
Improving docker-compose.yml
Renaming the database name, its user and password
The sample docker-compose.yml configuration is minimal and is not suitable for production. So the first thing you may want to do is replace the environment database name, user and password values for both the WordPress and DB containers. As our database user does not have significant permissions, this process requires the deletion of the existing database volume and any of its data.
WORDPRESS_DB_… values must match their MYSQL_… environment values.
 1wordpress:
 2  environment:
 3    WORDPRESS_DB_HOST: db
 4    WORDPRESS_DB_NAME: myblogdb
 5    WORDPRESS_DB_USER: wpinternal
 6    WORDPRESS_DB_PASSWORD: stencil-running-cargo-savage
 7
 8db:
 9  environment:
10    MYSQL_DATABASE: myblogdb
11    MYSQL_USER: wpinternal
12    MYSQL_PASSWORD: stencil-running-cargo-savage
Now we need to rebuild the MySQL database with these new values.
# Stop and remove the containers
$ docker-compose down

# Delete the db file volume
$ docker volume rm examplecom_db

# Rebuild, recreate, start and attach the container services
$ docker-compose up
To test the account and password changes run the following.
# Log into the database with the MySQL command-line client
$ docker-compose exec db mysql --user=wpinternal --password=stencil-running-cargo-savage myblogdb
Then in the mysql> prompt.
show tables;
quit;
Note that show tables; only return data if the WordPress installation is complete.
mysql> show tables;
+-----------------------+
| Tables_in_myblogdb    |
+-----------------------+
| wp_commentmeta        |
| wp_comments           |
| wp_links              |
| wp_options            |
| wp_postmeta           |
| wp_posts              |
| wp_term_relationships |
| wp_term_taxonomy      |
| wp_termmeta           |
| wp_terms              |
| wp_usermeta           |
| wp_users              |
+-----------------------+
12 rows in set (0.00 sec)

mysql> quit;
Bye
Add metadata labels
Labels are an optional means to apply metadata to Docker containers, images, volumes and networks. Generally, I use a minimal set of description labels for my containers but ignore the other options.
Labels use a distinctive syntax where the reverse domain name followed by the metadata name makes up the key. You can read more about this at Docker object labels but here are a couple of examples.
1"com.example.description=A description for example.com"
2"com.devtidbits.description=A description for this blog, The Developer's Tidbits"
In the docker-compose.yml I’ll add some labels to the containers and volumes.
 1version: "3.1"
 2
 3services:
 4  wordpress:
 5    image: wordpress
 6    labels:
 7      - "com.example.description=Example WordPress site"
 8    restart: always
 9    ports:
10      - 8080:80
11    environment:
12      WORDPRESS_DB_HOST: db
13      WORDPRESS_DB_USER: wpinternal
14      WORDPRESS_DB_PASSWORD: stencil-running-cargo-savage
15      WORDPRESS_DB_NAME: myblogdb
16    volumes:
17      - wordpress:/var/www/html
18
19  db:
20    image: mysql:5.7
21    labels:
22      - "com.example.description=Example WordPress database"
23    restart: always
24    environment:
25      MYSQL_DATABASE: myblogdb
26      MYSQL_USER: wpinternal
27      MYSQL_PASSWORD: stencil-running-cargo-savage
28      MYSQL_RANDOM_ROOT_PASSWORD: "1"
29    volumes:
30      - db:/var/lib/mysql
31
32volumes:
33  wordpress:
34    labels:
35      - "com.example.description=WordPress install"
36  db:
37    labels:
38      - "com.example.description=MySQL datastore"
To apply labels to the volumes, they need to be deleted and rebuilt, resulting in the loss of their data.
# Stop and remove the containers
$ docker-compose down

# Delete both the wordpress and db file volumes
$ docker volume rm examplecom_db examplecom_wordpress

# Rebuild, recreate, start and attach the container services
$ docker-compose up

# Inspect the new volumes
$ docker volume inspect examplecom_db examplecom_wordpress
 1[
 2  {
 3    CreatedAt: "2019-10-30T02:48:25Z",
 4    Driver: "local",
 5    Labels: {
 6      "com.docker.compose.project": "examplecom",
 7      "com.docker.compose.version": "1.24.1",
 8      "com.docker.compose.volume": "db",
 9      "com.example.description": "MySQL datastore",
10    },
11    Mountpoint: "/var/lib/docker/volumes/examplecom_db/_data",
12    Name: "examplecom_db",
13    Options: null,
14    Scope: "local",
15  },
16  {
17    CreatedAt: "2019-10-30T02:48:25Z",
18    Driver: "local",
19    Labels: {
20      "com.docker.compose.project": "examplecom",
21      "com.docker.compose.version": "1.24.1",
22      "com.docker.compose.volume": "wordpress",
23      "com.example.description": "WordPress install",
24    },
25    Mountpoint: "/var/lib/docker/volumes/examplecom_wordpress/_data",
26    Name: "examplecom_wordpress",
27    Options: null,
28    Scope: "local",
29  },
30];
Long-form syntax
The docker-compose.yml sample given on the WordPress docker hub page is intentionally compact. But for readability, I like to expand these configurations using the long-form syntax that was introduced in compose format 3.2. Firstly we need to update the version of docker-compose.yml, which is 3.1. You may as well update it to the newest version at the time of writng, 3.7.
1version: "3.7"
The two configurations in our compose file we can express in long-form are ports and volumes.
Ports
1ports:
2  - 8080:80
In the long-form syntax.
1ports:
2  - target: 80
3    published: 8080
4    protocol: tcp
Volumes
The WordPress volume.
1volumes:
2  - wordpress:/var/www/html
1volumes:
2  - type: volume
3    source: wordpress
4    target: /var/www/html
The database volume.
1volumes:
2  - db:/var/lib/mysql
1volumes:
2  - type: volume
3    source: db
4    target: /var/lib/mysql
WordPress configurations – wp-config.php
One of the most important files for any WordPress installation is wp-config.php. In this Docker container though we can embed any configurations directly into docker-compose.yml. A complete list of these configurations is at the WordPress support article https://wordpress.org/support/article/editing-wp-config-php/.
It’s important to note that most of the required database connection configurations are irrelevant because these are in the container’s environment values. Any additional configurations can be added using the WORDPRESS_CONFIG_EXTRA variable. For example, these extra configs may be required and set to true in a production environment.
 1environment:
 2  WORDPRESS_DB_HOST: db
 3  WORDPRESS_DB_USER: wpinternal
 4  WORDPRESS_DB_PASSWORD: stencil-running-cargo-savage
 5  WORDPRESS_DB_NAME: myblogdb
 6  WORDPRESS_CONFIG_EXTRA: |
 7    # Require SSL for admin and logins
 8    define( 'FORCE_SSL_ADMIN', false );
 9    # Disable plugin and theme update and installation
10    define( 'DISALLOW_FILE_MODS', false );
11    # Disable the plugin and theme editor
12    define( 'DISALLOW_FILE_EDIT', false );
Any changes to the WORDPRESS_CONFIG_EXTRA variable requires the deletion of the existing wp-config.php file that is on the WordPress volume. Otherwise, the changes are not applied.
wordpress_1 | WARNING: environment variable "WORDPRESS_CONFIG_EXTRA" is set, but "wp-config.php" already exists
wordpress_1 | The contents of this variable will _not_ be inserted into the existing "wp-config.php" file.
To delete an existing wp-config.php in the container.
# Run the container in detached mode
$ docker-compose up --detach

# Run an optional test shell command on the wordpress container
$ docker-compose exec wordpress ls

# Delete the wp-config.php
$ docker-compose exec wordpress rm wp-config.php

# Restart the container to generate a new wp-config.php
$ docker-compose down && docker-compose up --detach

# View the content of the new wp-config.php
$ docker-compose exec wordpress cat wp-config.php
The output from cat wp-config.php should reveal the following appended additions.
// WORDPRESS_CONFIG_EXTRA
# Require SSL for admin and logins
define( 'FORCE_SSL_ADMIN', false );
# Disable plugin and theme update and installation
define( 'DISALLOW_FILE_MODS', false );
# Disable the plugin and theme editor
define( 'DISALLOW_FILE_EDIT', false );
Add configurations to PHP
WordPress is a PHP: Hypertext Preprocessor application, an old open-sourced language for the web that was very popular in the late 1990s and 2000s. PHP has its methods of configuration directives in the form of php.ini files.
Fix the 2 MB WordPress upload limit
Out of the box PHP and so also WordPress has a hard 2 MB upload limit for file forms. It means any images, videos or imported data uploads have a size limit when using WordPress. We can quickly fix that by creating our PHP configuration and binding it to the WordPress container.
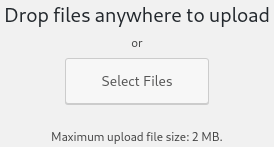
Create a new PHP configuration file, and name it docker-uploads.ini. Add the following configuration then save the changes.
1# Allow HTTP file uploads
2file_uploads = On
3
4# Maximum size of an uploaded file
5upload_max_filesize = 64M
6
7# Maximum size of form post data
8post_max_size = 64M
Update the docker-compose.yml to bind the docker-uploads.ini to the wordpress container and then restart the WordPress container.
1volumes:
2  - type: volume
3    source: wordpress
4    target: /var/www/html
5  - type: bind
6    source: ./docker-uploads.ini
7    target: /usr/local/etc/php/conf.d/docker-uploads.ini
# Rebuild our container
$ docker-compose down && docker-compose up --build
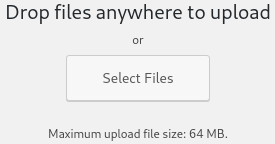
Visit the Upload New Media page to confirm the changes are active, http://localhost:8080/wp-admin/media-new.php
Add configurations to Apache
The WordPress container usages a Debian installation of Apache HTTP Server to serve the web application. This combination uses a unique directory structure for Apache’s configuration files, but thankfully we can still bind our configurations to this setup.
Fix the Apache notice, could not reliably determine the server’s fully qualified domain name
One problem we currently have in the log files that is fixable is this warning from Apache.
wordpress_1 | apache2: Could not reliably determine the server's fully qualified domain name, using 172.21.0.3. Set the 'ServerName' directive globally to suppress this message
Create a new Apache configuration file, and name it docker-servername.conf. Add the following configuration then save the changes.
1# Hostname and port that the server uses to identify itself
2ServerName localhost
Update the docker-compose.yml to bind the docker-servername.conf to the WordPress container and then rebuild.
 1volumes:
 2  - type: volume
 3    source: wordpress
 4    target: /var/www/html
 5  - type: bind
 6    source: ./uploads.ini
 7    target: /usr/local/etc/php/conf.d/uploads.ini
 8  - type: bind
 9    source: ./docker-servername.conf
10    target: /etc/apache2/conf-enabled/docker-servername.conf
# Rebuild our container
$ docker-compose down && docker-compose up --build
The Apache warning for the fully qualified domain name is gone.
Add configurations to MySQL
Fix the MySQL warning, TIMESTAMP with implicit DEFAULT value is deprecated
Out of the box, MySQL 5.7 throws this warning on startup. We can quickly fix this by binding our own MySQL configuration file to the DB container.
db_1 | [Warning] TIMESTAMP with implicit DEFAULT value is deprecated. Please use --explicit_defaults_for_timestamp server option (see documentation for more details).
Create a new MySQL configuration file, and name it docker-fixes.cnf. Add the following configuration then save the changes.
1[mysqld]
2explicit_defaults_for_timestamp=on
Update the docker-compose.yml to bind the docker-fixes.cnf to the DB container and then restart.
1volumes:
2  - type: volume
3    source: db
4    target :/var/lib/mysql
5  - type: bind
6    source: ./docker-fixes.cnf
7    target: /etc/mysql/conf.d/docker-fixes.cnf
$ docker-compose down && docker-compose up
The TIMESTAMP with implicit DEFAULT value is deprecated warning should now not appear.
Add Adminer, a web interface for MySQL
For an optional, lightweight web interface for the MySQL database, you can attach an Adminer container to the composition. It also uses port 8080, which conflicts with our WordPress container, so I’ve swapped it to port 8070.
Update the docker-compose.yml to add the Adminer container to the composition and then restart.
1services:
2  adminer:
3    image: adminer
4    restart: always
5    ports:
6      - target: 8080
7        published: 8070
8        protocol: tcp
$ docker-compose down && docker-compose up
Visit http://localhost:8070 and use the username, password and database values saved to the MYSQL_DB… environment values to sign-in.
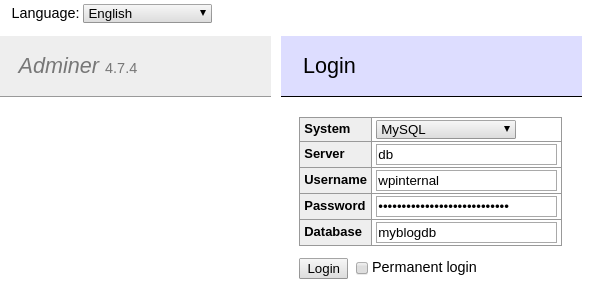
Congratulations, now you know how to customise all the components your WordPress Docker installation. The final result for the docker-compose.yml is shown below and is also available at https://github.com/bengarrett/devtidbits.com.
 1version: "3.7"
 2
 3services:
 4  wordpress:
 5    image: wordpress
 6    labels:
 7      - "com.example.description=Example WordPress site"
 8    restart: always
 9    ports:
10      - target: 80
11        published: 8080
12        protocol: tcp
13    environment:
14      WORDPRESS_DB_HOST: db
15      WORDPRESS_DB_USER: wpinternal
16      WORDPRESS_DB_PASSWORD: stencil-running-cargo-savage
17      WORDPRESS_DB_NAME: myblogdb
18      WORDPRESS_CONFIG_EXTRA: |
19        # Require SSL
20        define( 'FORCE_SSL_ADMIN', false);
21        # Disable plugin and theme update and installation
22        define( 'DISALLOW_FILE_MODS', false );
23        # Disable the plugin and theme editor
24        define( 'DISALLOW_FILE_EDIT', false );
25    volumes:
26      - type: volume
27        source: wordpress
28        target: /var/www/html
29      - type: bind
30        source: ./docker-uploads.ini
31        target: /usr/local/etc/php/conf.d/docker-uploads.ini
32      - type: bind
33        source: ./docker-servername.conf
34        target: /etc/apache2/conf-enabled/docker-servername.conf
35  db:
36    image: mysql:5.7
37    labels:
38      - "com.example.description=Example WordPress database"
39    restart: always
40    environment:
41      MYSQL_DATABASE: myblogdb
42      MYSQL_USER: wpinternal
43      MYSQL_PASSWORD: stencil-running-cargo-savage
44      MYSQL_RANDOM_ROOT_PASSWORD: "1"
45    volumes:
46      - type: volume
47        source: db
48        target: /var/lib/mysql
49      - type: bind
50        source: ./docker-fixes.cnf
51        target: /etc/mysql/conf.d/docker-fixes.cnf
52  adminer:
53    image: adminer
54    restart: always
55    ports:
56      - target: 8080
57        published: 8070
58        protocol: tcp
59
60volumes:
61  wordpress:
62    labels:
63      - "com.example.description=WordPress install"
64  db:
65    labels:
66      - "com.example.description=MySQL datastore"
Written by Ben Garrett
