Implement a SFTP Service for Ubuntu/Debian with a chroot’ed, isolated file directory.
7 minutes
Tip using Ko-fi or Buy Me a Coffee
In this entry, I will explain how to install and setup an SFTP service in an Ubuntu or Debian Linux server. SFTP (Secure File Transfer Protocol) is an extension of the SSH (Secure SHell protocol) which is for secure remote access into systems.
Despite its name, SFTP is not an extension to the 1985 FTP (File Transfer Protocol – RFC 959) which was in frequent use until the late 1990s to share files online. FTP usage has fallen out of favour for Internet use in the 2000’s due to the protocol’s inherent insecurities in addition to competition from a newer protocol such as the bandwidth-friendly BitTorrent protocol. The most glaring vulnerability with FTP is that it requires log-in usernames and passwords communicated between the client and the server using unencrypted plain-text.
Fortunately, in recent years many of the more popular FTP clients have implemented complete support for SFTP making the end-user transition from insecure to secure transfers seamlessly. Older, now redundant stop gaps for secure FTP such as FTPS/FTP-SSL which is now referred to as FTP with TLS (RFC 4217) were confusing to use and difficult to set up correctly.
It is now at the point where people probably would not know the difference between browsing a secure SFTP site to browsing an open, insecure FTP site. Personally, my favourite FTP/SFTP client is the multi-platform, open-sourced FileZilla but there are many others such as SmartFTP, WinSCP or FireFTP (for Firefox).
Okay to the task at hand we will do everything in CLI (command line interface) aka shell mode.
First, make sure your repository is up to date.
sudo apt-get update
Now install OpenSSH server software.
sudo apt-get install openssh-server
We then create a user group for SFTP access; I will be calling it sftponly. For security, I think it is best practice not to allow accounts with SFTP access additional admission to the server using secure shell (SSH) remote login.
sudo groupadd sftponly
Run the following to display your new group, shown as the last entry.
cat /etc/group
Cat allows you to quickly display a text file while /etc/group is the file that defines the groups on the server. You should see something like this.
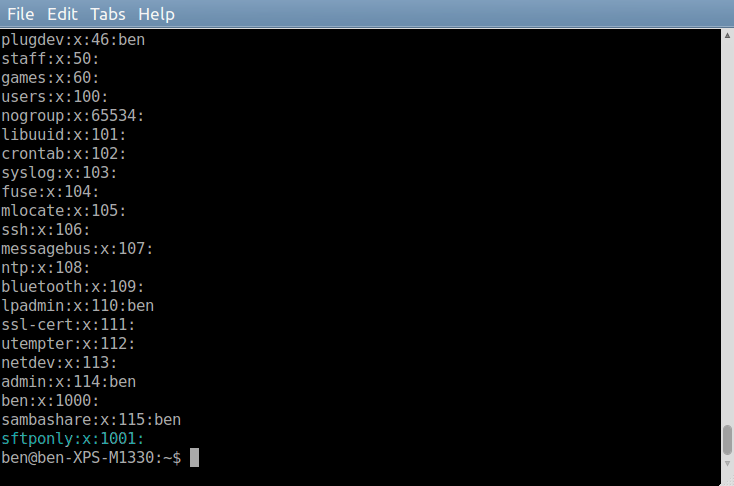
Each line is an individual group, and you can see the name, the password which is set to x which means none, the numeric group id and users who are associated with the group. For sftponly there are currently no assigned users.
Take note of the group id, in this screenshot; it is the value 1001.
We now add a new user that we will use exclusively for SFTP access.
sudo useradd [user name] -d / -g [sftponly group id] -M -N -o -u [sftponly group id]
sudo passwd [user name]
The arguments we used.
-dis the user home directory which needs to be set to/(root).-gis the user group id to assign which in our example needs to be assigned to sftponly.-Mstops the useradd command creating a home directory.-Nuseradd by default creates a group with the same name as the new user, this disables that behaviour.-uis the user id, which in our case needs to be the same id value as sftponly.-oallows duplicate, non-unique user ids.- The
passwdcommand sets an encrypted user password.
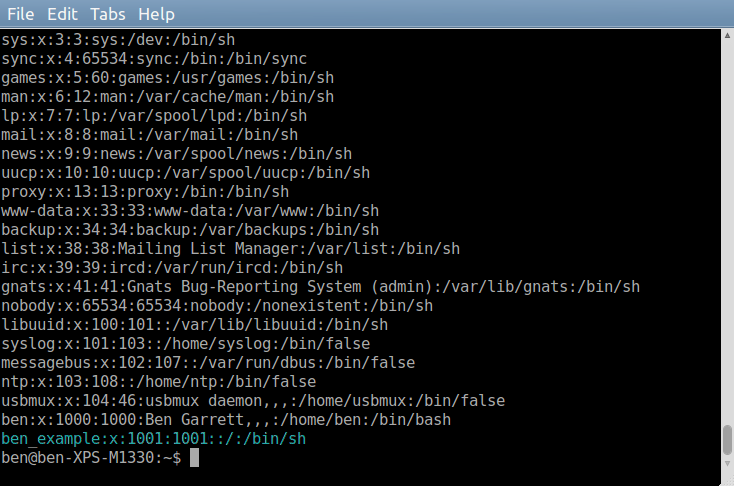
Add a user of your choice; I will use ben_example. To display your users.
cat /etc/passwd
We now back up and edit the SSH Daemon configuration file.
sudo cp /etc/ssh/sshd_config /etc/ssh/sshd_config.bak
sudo nano +76 /etc/ssh/sshd_config
The line
Subsystem sftp /usr/lib/openssh/sftp-server
Needs to be replaced with
Subsystem sftp internal-sftp
Now go to the end of the document, the key combination
Alt+/ should take you there or you could just use the
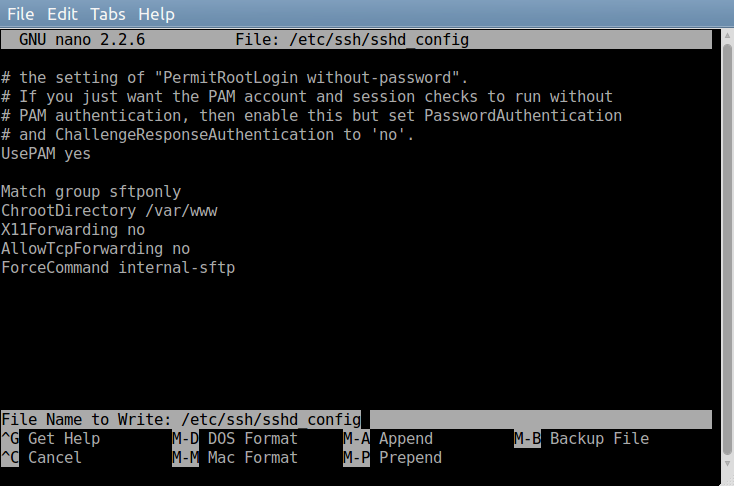
PgDn key. After UsePAM Yes add the following lines to configure our sftponly group permissions and settings. The ChrootDirectory setting will confine all sftponly users to this directory. Otherwise, sftponly will have access to your server,
which you do not want. /var/www is often the default Debian/Ubuntu location for web servers to place their assets such as HTML, CSS files and images. Though you can use a different directory for ChrootDirectory such as /var/sftp.
Match group sftponly
ChrootDirectory /var/www
X11Forwarding no
AllowTcpForwarding no
ForceCommand internal-sftp
Once finished use the key combination Ctrl+O to save and then Ctrl+X exit.
Now make sure the directory you assigned to ChrootDirectory exists and if it does not then create it. Also, the directory group and owner need to be root which it should by default if you use the command.
sudo mkdir /var/www
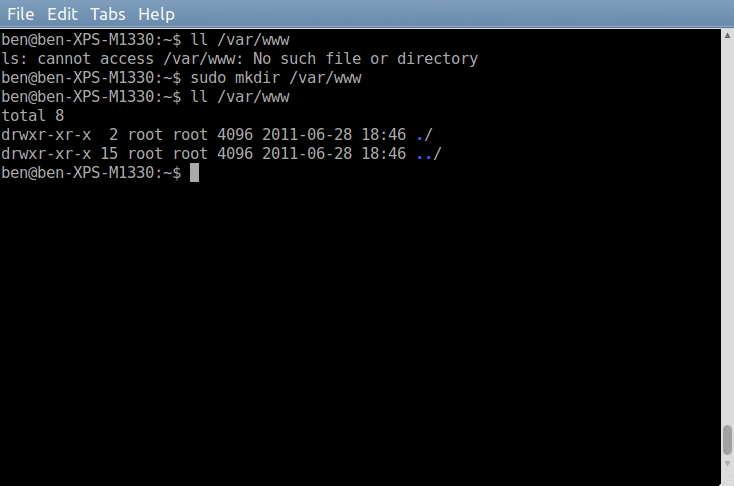
A reminder: the directory and its parent directories you assign to ChrootDirectory MUST be owned by root and assigned the group root. Otherwise, SFTP clients will not be able to upload or modify files and directories.
Now for later testing create the first of 3 directories within your ChrootDirectory.
cd /var/www
sudo mkdir test_readonly
sudo chmod 755 test_readonly
If you do not understand the chmod command shown? We will quickly go through it, but it is beyond the scope of this article. Change mode (chmod) parameter 755 is a permission code in octal notation. You break it up into three parts, 7/5/5.
- 1st part is root permission for this directory.
- 2nd is group permission.
- 3rd is everyone else.
The value of the individual part grants permissions for its user. A value of 0 grants no permission, a value of 1 grants execute permissions, 2 grants write and 4 grants read. These values can be summed to create multiple permissions. So 1 (execute) + 2 (write) + 4 (read) equals 7 which grants execute, write and read aka total access. chmod 755 test_readonly means the root has total access. While users associated with the directory’s group and everyone else only have execute and read access, 4 (read) + 1 (execute) = 5. More can be read about Linux permissions here http://en.wikipedia.org/wiki/File_system_permissions#Symbolic_notation.
sudo mkdir test_readwrite
sudo chown root:sftponly test_readwrite
sudo chmod 775 test_readwrite
The above commands creates a test_readwrite directory whose owner is root and group is sftponly. Both root and sftponly members have full access permissions within test_readwrite, which allows the creation and deletion of files and sub-directories.
To remove browsing access to a directory you remove the read permission as shown below. 1 (execute) + 2 (write) = 3, execute and write access but critically no read which leaves the other two permissions redundant.
sudo mkdir test_noaccess
sudo chmod 733 test_noaccess
Restart the SSH server.
sudo /etc/init.d/ssh restart
If you don’t know your server IP address.
ip -o -f inet addr
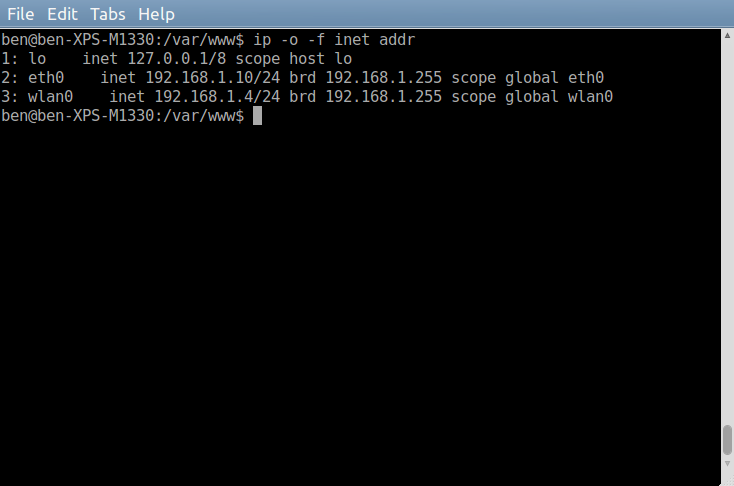
lo is your local host, eth0 is your Ethernet cable connected address, wlan0 is probably wireless.
Connect to your SSH server using an SFTP client such as FileZilla. Make sure you use the correct IP address and port number which by default is 22.

You should be connected to the directory assigned to ChRootDirectory (/var/www/) in the SSHD configuration, and that doubles as the SFTP client root folder. Also listed should be the test_readonly, test_readwrite and test_noaccess directories that we created earlier. Play or navigate around; hopefully, you can upload files and create/delete directories within test_readwrite. While test_noaccess should be displayed but limited to browsing or download access.
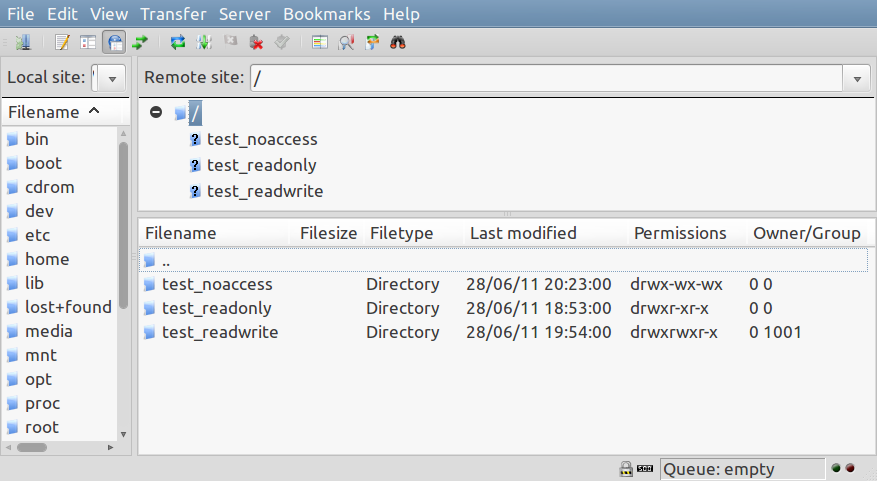
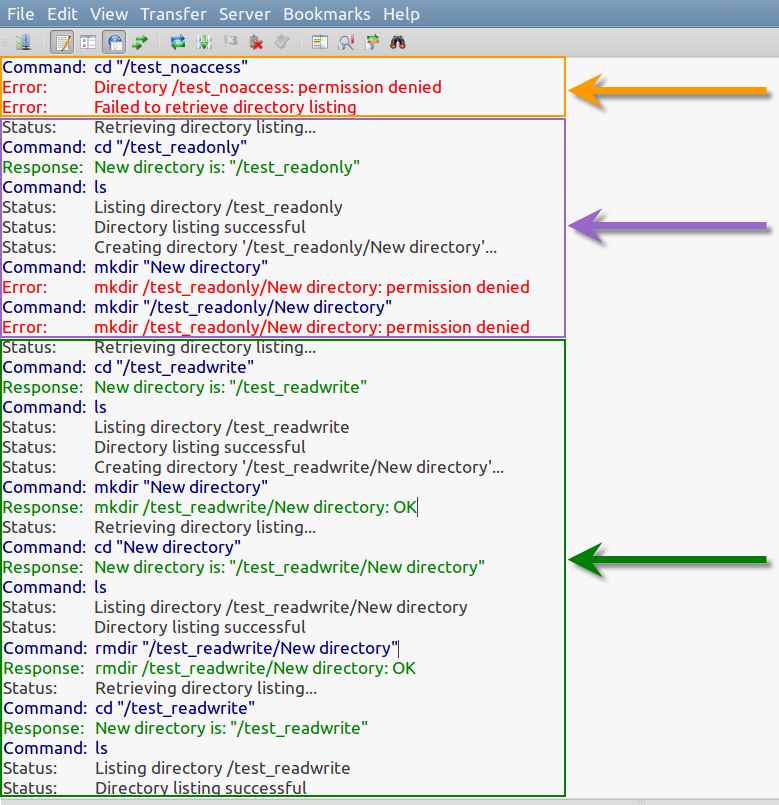
In the screen capture below we have Filezilla’s message log with 3 sections highlighted. The orange section shows my failed attempt at accessing test_noaccess. The purple is the successful attempt at accessing test_readonly, but a failure in creating a New directory sub-folder within. While the green section shows access into test_readwrite, as well as being able to create a New directory sub-folder and its subsequent removal.
Congratulations you now have a working example of a SFTP service running on your server. A number of these instructions are from the blog post SFTP on Ubuntu and Debian in 9 easy steps and the reader comments.
Written by Ben Garrett
